Behind the Scenes #6: Tutorials & Advisor
Hello everyone! It’s time for another development diary, the last one in our mini-series taking you behind the scenes. Today, we take a look at the tutorials available in the game, how they work, and what kind of helpful information they provide.
Our goal with the tutorials in Cities: Skylines II is to provide you with a thorough introduction to the game and guide you toward building a successful city. While we had small in-game guides in Cities: Skylines to explain different services or features, they were quite limited, so we developed a new system for Cities: Skylines II to help both players familiar with its predecessor and players new to the genre.
Tutorials can be enabled at the beginning of the game and function as a guide bringing you essential information on how to start a city. They provide easy step-by-step instructions on the basic city needs and help set up the city for future growth. As the game progresses, the steps of the tutorials provide more information and fewer step-by-step guides letting you take the reins and choose the direction for your city. Tutorials have no time limit on how long to take on each step and are shown for services and panels when the service or panel is opened.
Tutorials work together with tooltips and other information in panels, which provide more in-depth information about what the feature is, while tutorials focus more on how and where to build and place the feature. Together they provide a good overview of how to use each feature to make a successful city.
For beginners, the tutorials provide an easy start with more guided and instructional beginning with additional information and hints as the city expands and more features are opened. For experienced players, the tutorials provide information on the features that are new and a helpful resource if stuck on something or uncertain about how a feature works. Tutorials are optional and can be turned on or off at any time, and even when turned off they are easy to reach in the Advisor found at the top-right of the screen. Just open the panel and select the feature you want to learn more about.
There is also an option to restart or continue the tutorials. These options can be used on the same map while continuing to build the city already started, or on a new map, with a new city.
STARTING WITH TUTORIALS
At the beginning of the tutorials, there are a few basic instructions on how to move around. These are called Camera Controls and will get you started. In addition to the basic camera movements, there are quite a few keyboard shortcuts to use. The keyboard shortcuts are listed in the options menu under Input. Each one can be changed from the default to whatever feels most comfortable, and reset bindings will restore them to the default settings if the need arises.
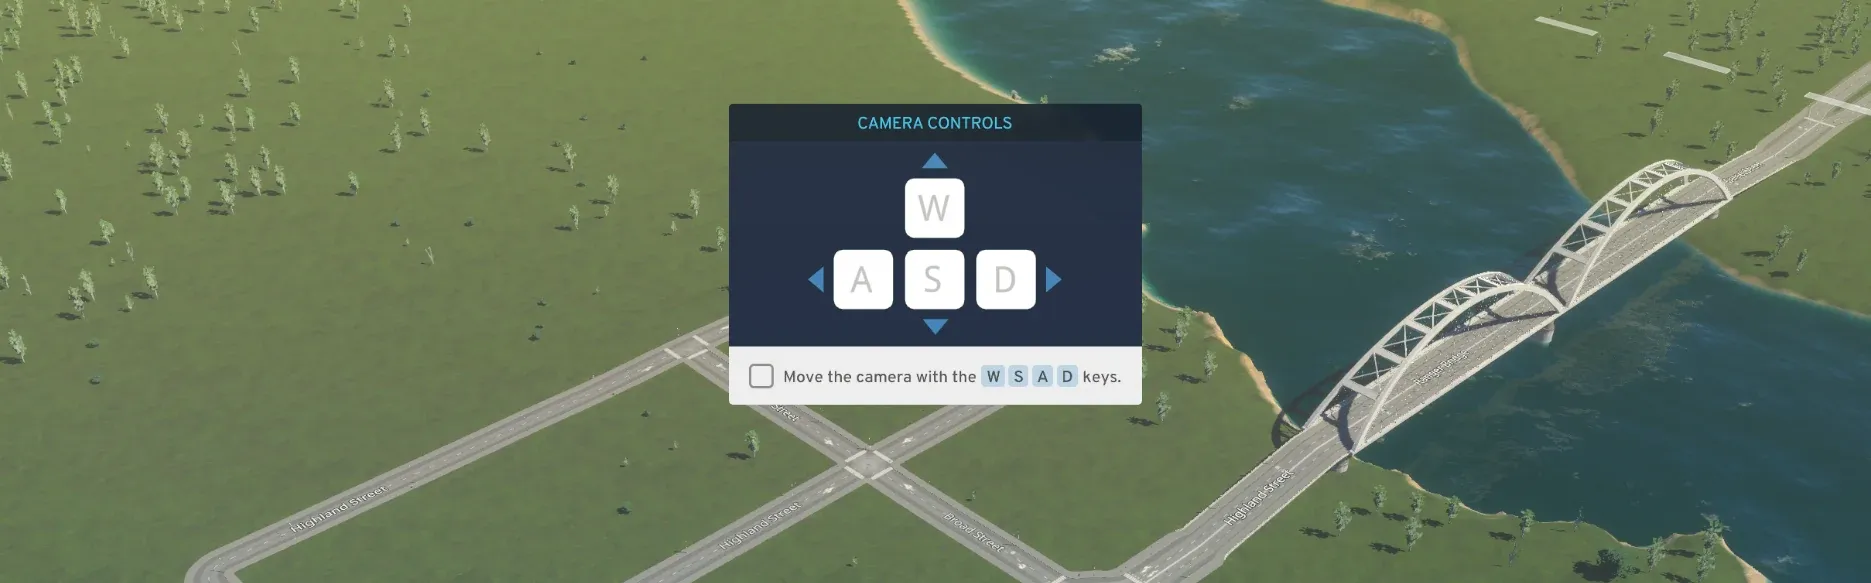 Camera Controls Tutorial cards appear in the middle of the screen and display the appropriate instructions depending on whether the game uses a keyboard and mouse or a controller. When the movement has been successfully completed, the instruction text will turn green and the next step is shown.
HOW TO BUILD A CITY
Once you have a hang of the controls, it’s time to build a city. The tutorials give you a short list of tasks to fulfill which cover the basic needs of a city. Each task has the goal of building an essential utility for the city and showing the very basics of road building and how to zone. These task tutorials are aimed at new players and beginners but contain information about new features in familiar services for experienced players. When the tasks are done, the city is ready to start growing and expanding with more services and controls. During the task list, tutorials are not skippable but become skippable when the list has been completed.
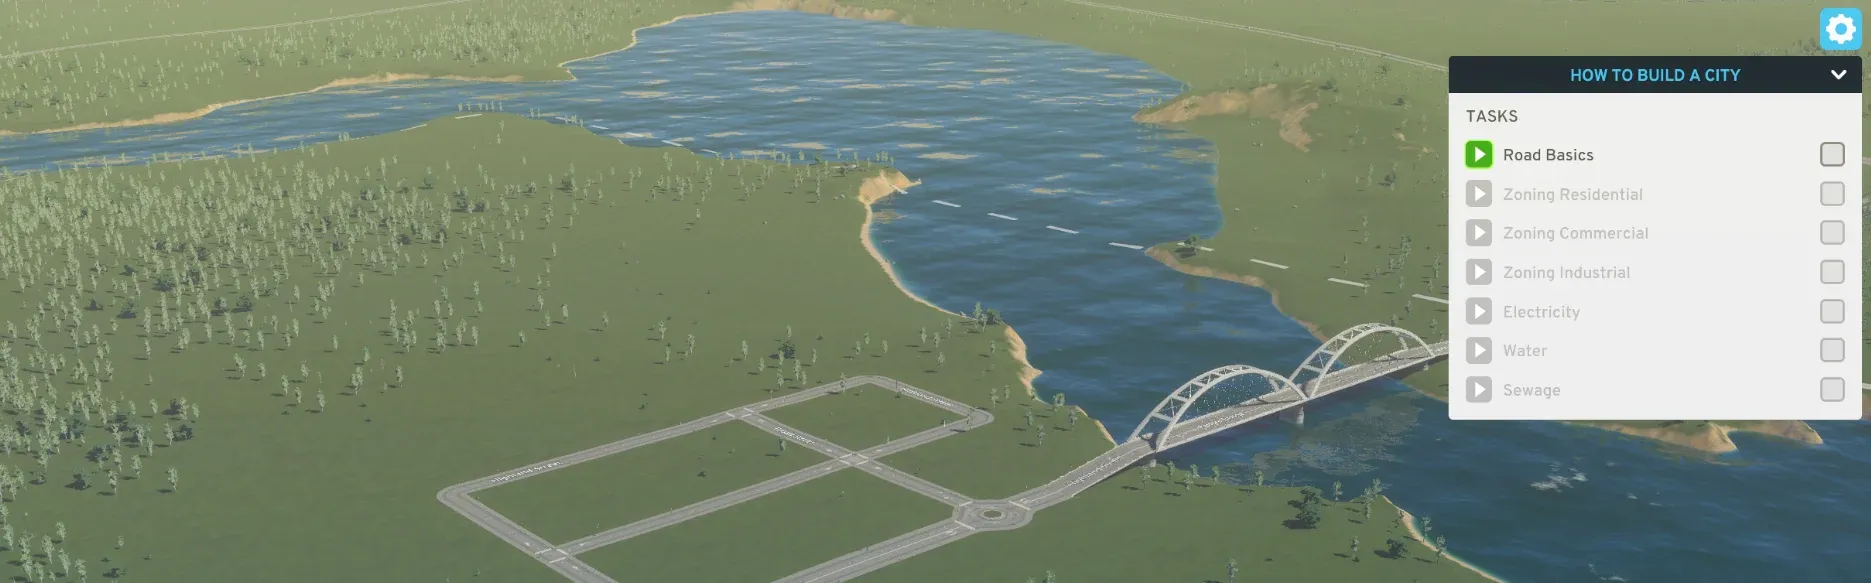 TASKS in the task list are tutorials that will start by pressing the play button. You can take as much time with each tutorial as you need, and return to any of them to look through the information or do the tutorial again, by pressing the play button. Tasks will remain gray and locked until the previous task has been done.
DIFFERENT TYPES OF TUTORIAL STEPS
Tutorials are broken down into a few different types of steps with guides to help you find the relevant place to go. There are balloons that point to features, center cards with information, and task cards that have instructions on how to build something.
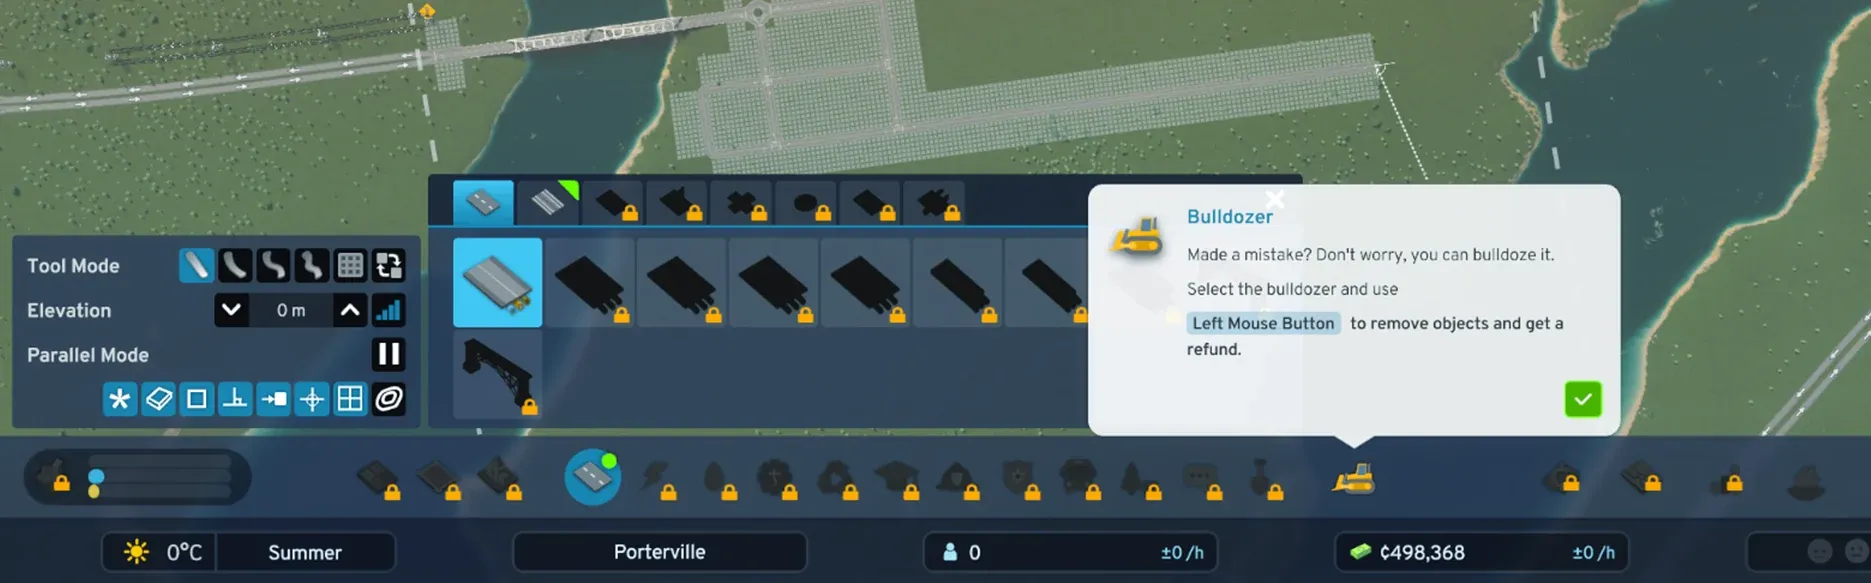
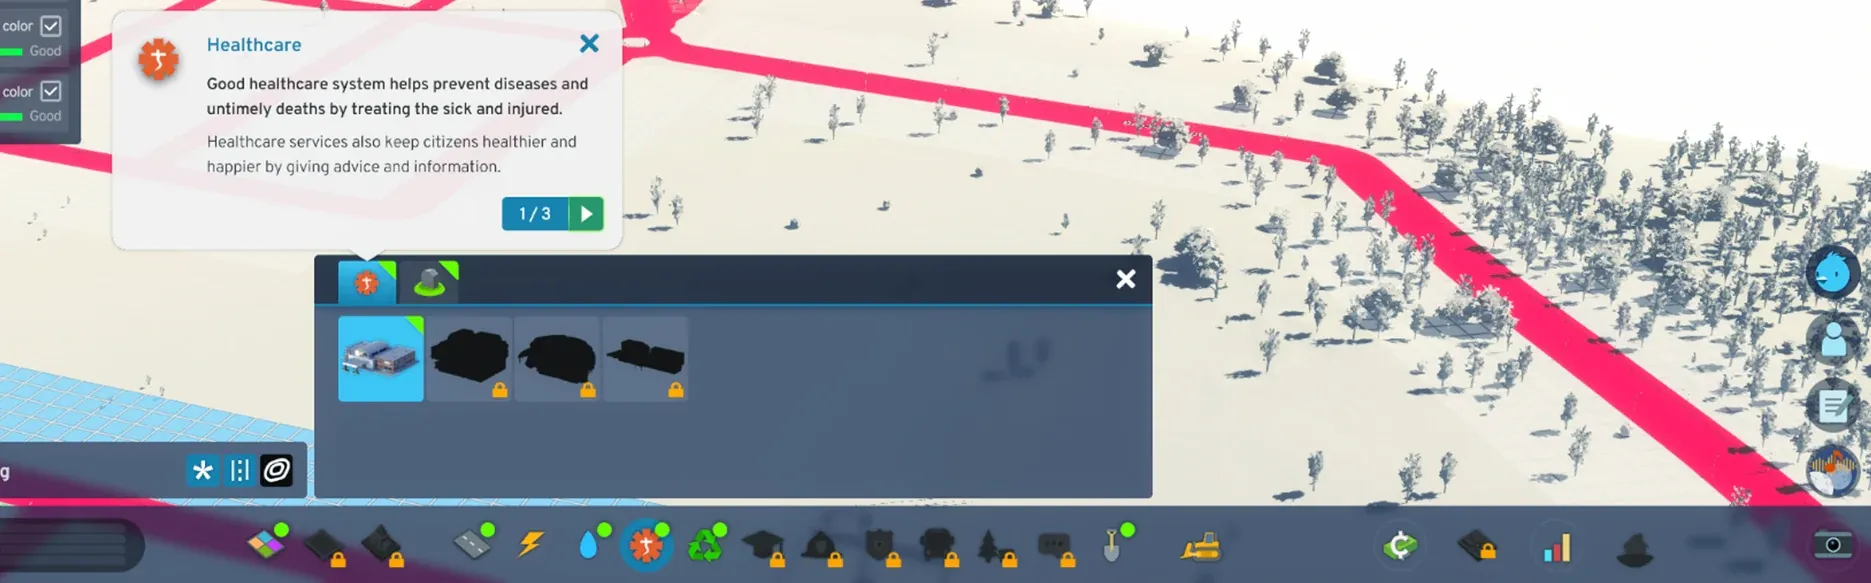
** FIRST STEP BALLOON **The first step balloon points to the item it’s talking about and highlights it with a green outline around the icon. These give overall information about the features, like roads or services, and the green outline is animated to encourage you to click the icon and open the menu to move to the next tutorial step. If the panel or service is closed before the tutorial is finished the green outline will appear around appropriate icons and tabs to show you where to go.
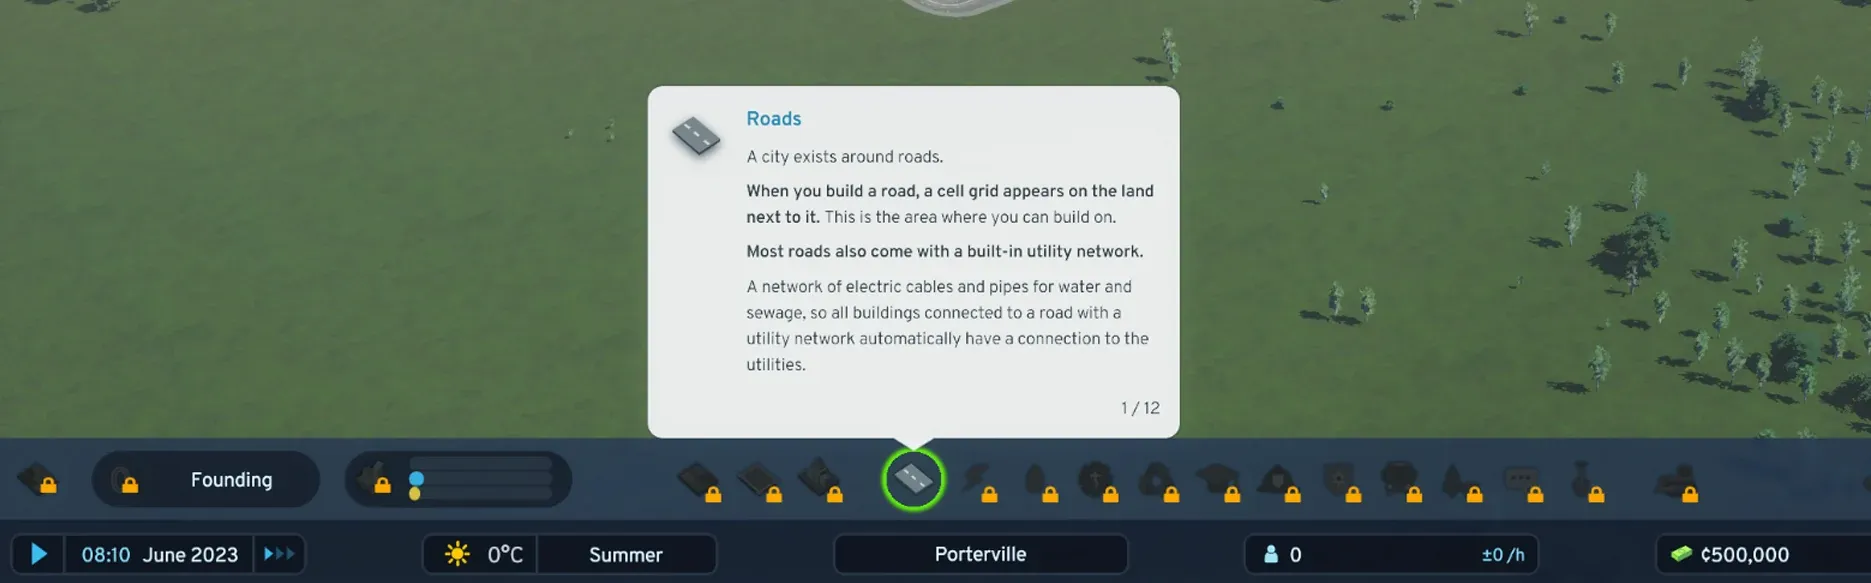 The green blinking outline guides you to where the service or feature is found. To move the tutorial forward to the next step, the icon needs to be selected.
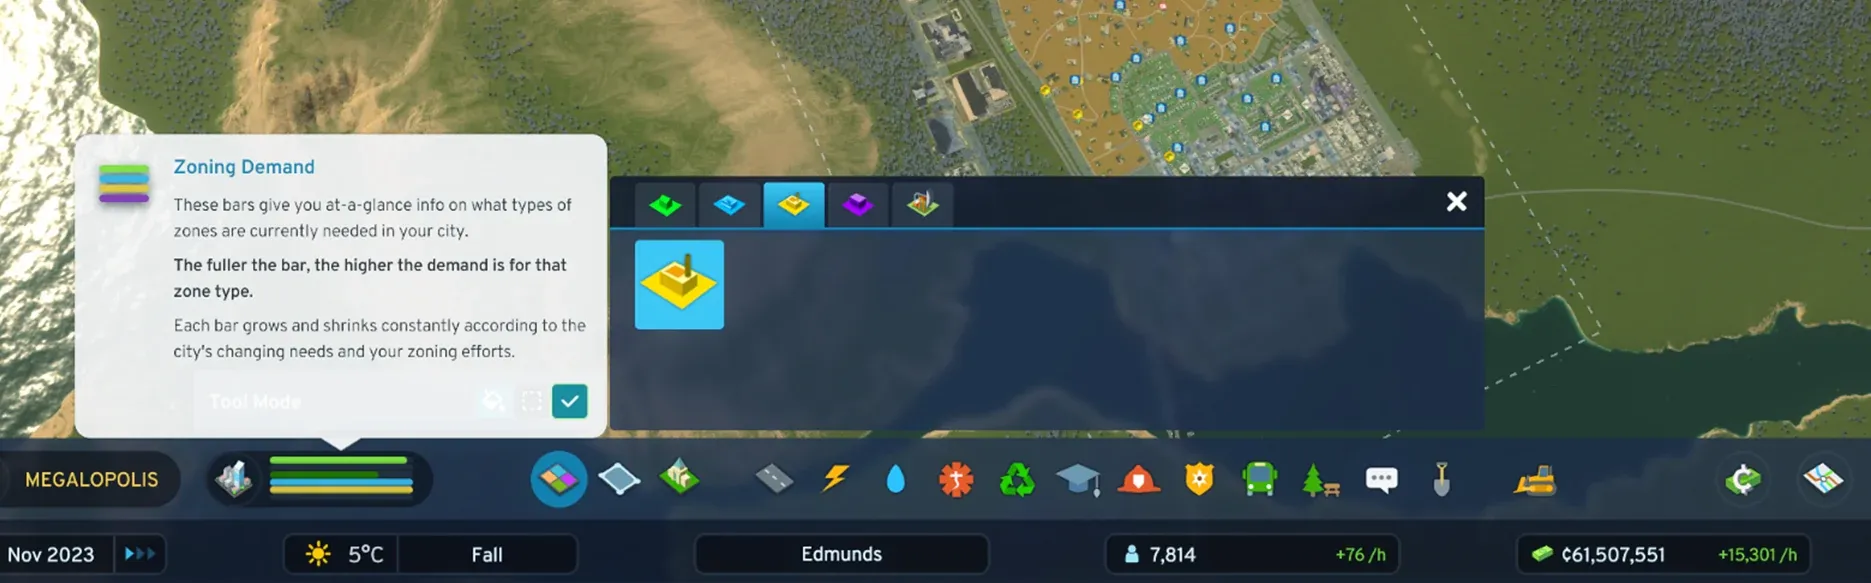
**BALLOON STEPS **Balloon steps are next. These point to things like assets and tools. You can freely move backward and forward through these steps to get familiar with the tools and controls before moving on to building. These steps will point out some of the common useful tools and their controls, highlighting new additions that might go unnoticed otherwise. The explanations are short and more details are displayed in the tooltips or panels about the feature in question if you want to learn more.
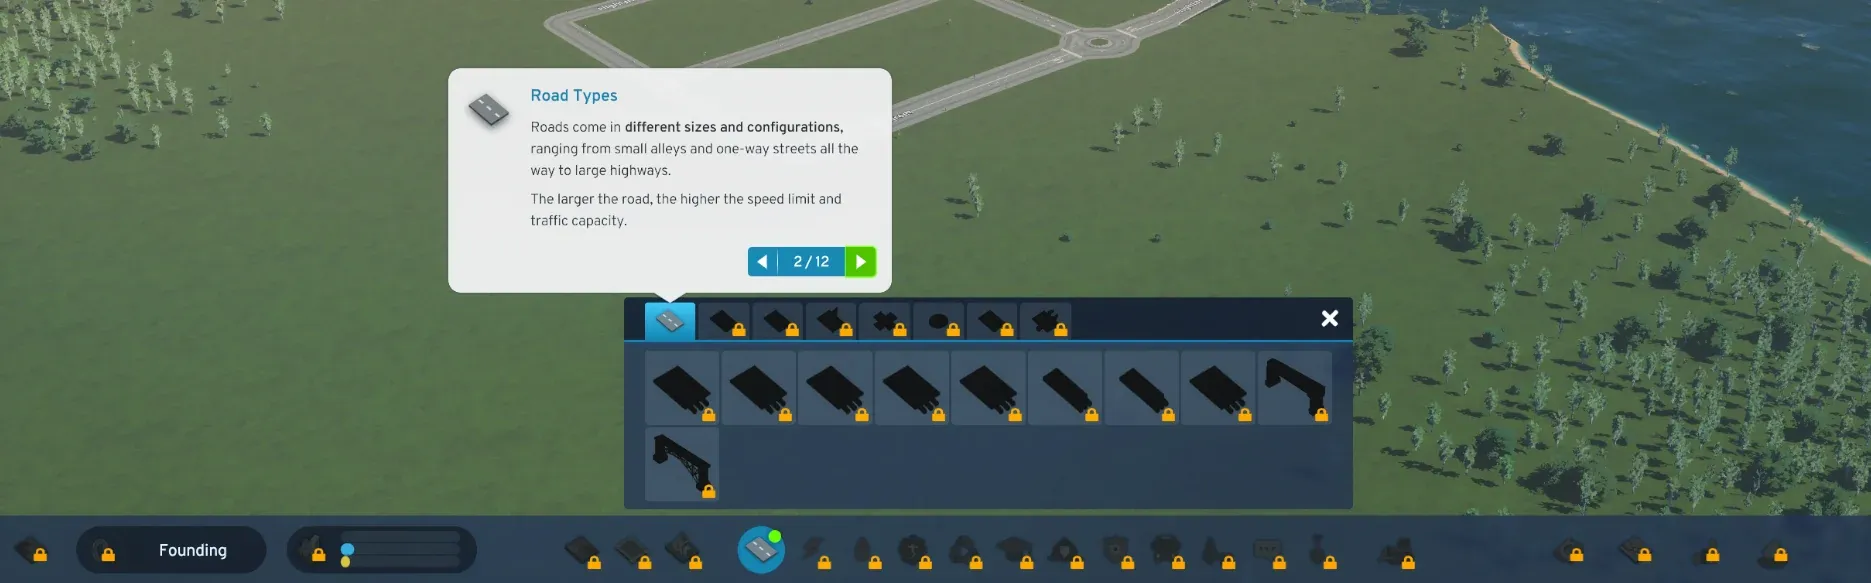 The balloon step will point to the feature it’s talking about. The number between the arrows shows what step you are in, and how many steps there are in total. When the tutorial has been completed once, the steps become closable.
**TASK CARDS **Task Cards are often the last step of a tutorial sequence. Task cards are instructions on how and where to build and will complete the tutorial when done, though not all tutorial sequences have a card with a task at the end. Tasks are given when there is something to build. While the task list is active there are more of these task cards, but once it’s completed the task cards will show up only for more complex builds like public transportation. The text will scroll if it’s too long to fit in the space and the card can be minimized while building without closing the tutorial. To minimize the card, close and re-open the card with the small arrow on the title bar.
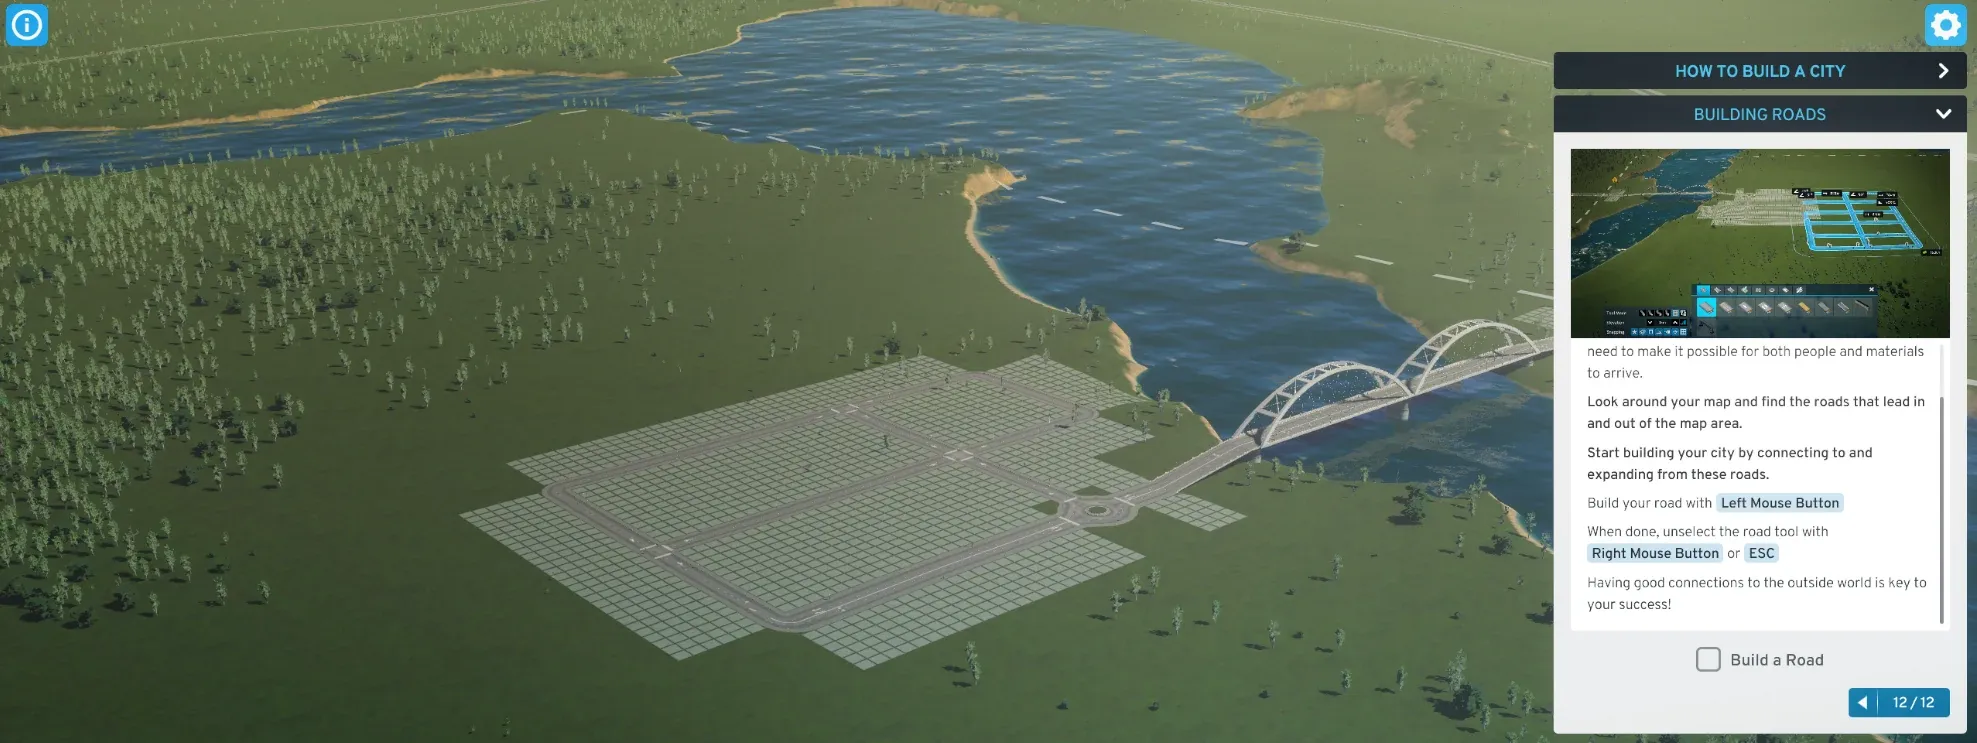 Task cards have an image, text, and if relevant guides to keys or selection buttons to use. When the task has already been done once there will be a checkmark next to the card number to close and finish the tutorial without needing to complete the task again.
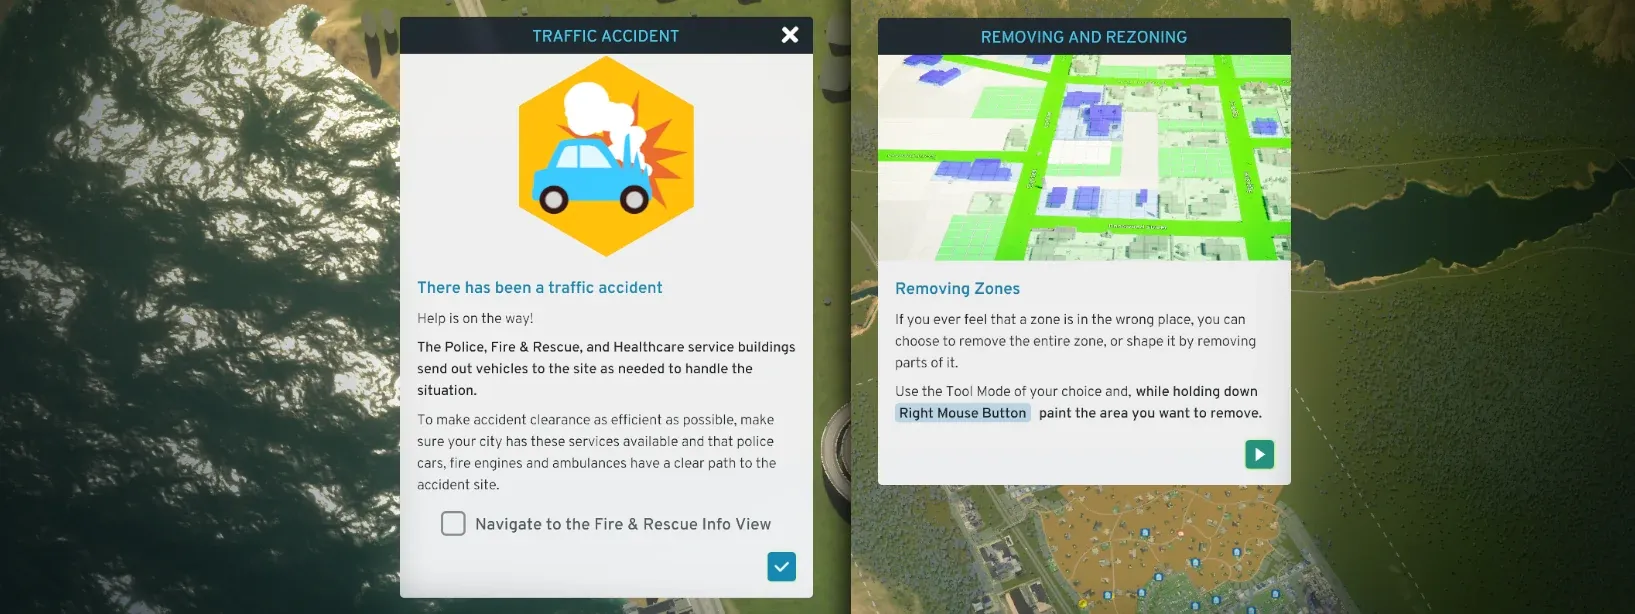
**CENTER CARD **Center Cards are used when there is no specific icon, tool, or panel to point to. These will show you information about things like info views and might pop up to draw attention to a new type of problem in the city. Center cards can be looked through by selecting the arrow. When the card includes a task, the panel will close after the task is done or it can be closed without completing the task.
HINTS
What’s the difference between a hint and a tutorial? Hints are tutorials that pop up between the task list tutorials and are short information balloons that don’t have a task and can be closed once read. Hints point out tools that are particularly useful at the moment. After the hint has been shown it will appear at the bottom of the task list and can be accessed later in the Advisor along with all the other tutorials.
 Hints point out things that could be handy to know. They don’t need any action and if the information is not useful at the moment they can be closed. If you want to see a hint again select it in the task list or Advisor and it will open.
TUTORIALS AFTER THE TASK LIST
After the task list is done, the tutorials will show up when a new service or panel is opened for the first time. New features have a green indicator at the top right corner of its icon. These tutorials function the same as they did during the task list, except that they can be closed at any step and don’t need to be completed. When they are closed they will be added to the Advisor where they can be opened again at any time.
 Tutorials will open when a new service or panel is opened. New services will be unlocked as the city grows.
TEXT HIGHLIGHT
Text Highlights are bolded text in the tutorial that shows the most relevant information in that tutorial. Reading just the bolded text will give the short answer to what the feature is and the rest of the text adds more detail. There is a lot of information to read when combining all the tutorials, tooltips, and panels, and highlights give you a quicker way to scan the information and pick what interests you the most at the moment.
 Highlighted text is bolded and is the core of the information in the tutorial.
ADVISOR
After the task list is completed the Advisor will appear in the top-right corner of the screen, or if you play with tutorials turned off, it will be available from the start. Simply select the question mark to open the Advisor and access its collection of all the tutorials in the game. Tutorials are divided into five groups: Services, City, Info Views & Notifications, Citizens, and Interface & Tools. Under these groups, you will find subgroups like Electricity where all the tutorials relevant to that service can be found. To expand or close a group select the small arrow icon and select the tutorial to open it. If the tutorial has more than one step, select the top step or skip to any step you want to start from. Steps are marked with a small dot to make them easily recognizable. Tutorials are added to the list when services or panels are unlocked.
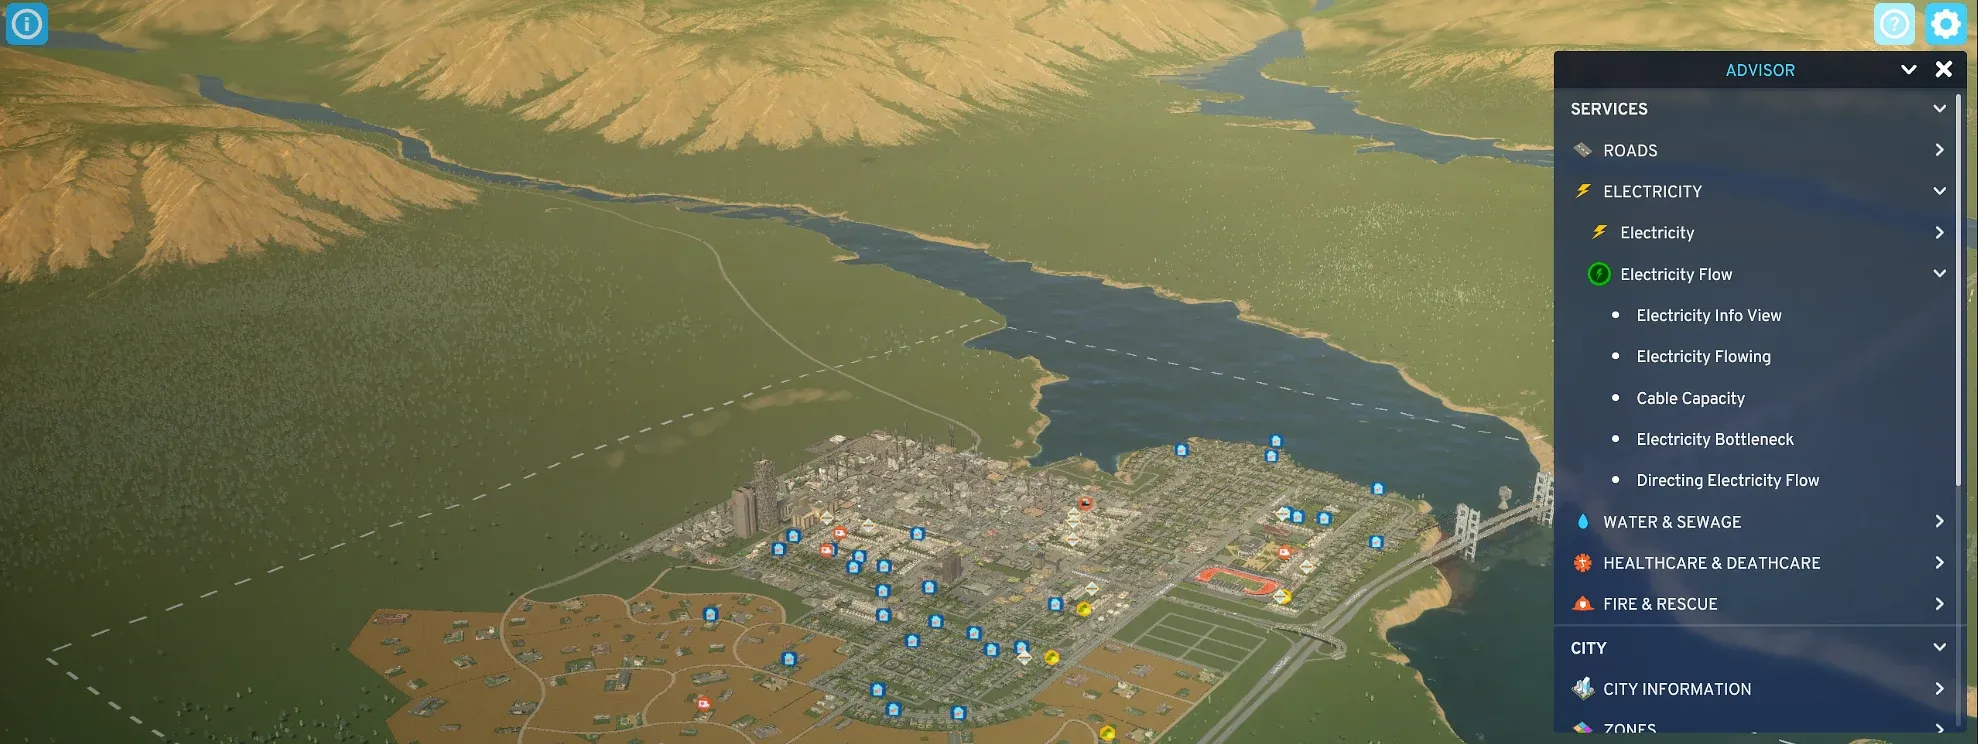 The Advisor collects all tutorials that have been completed for later use if needed. When tutorials are off, all tutorials are added to the advisor without being played.
STARTING WITHOUT TUTORIALS
You can choose not to have tutorials on and open them manually from the Advisor if you need them later on. Only the tutorials for the services and features that have been unlocked will be visible in the Advisor, and each time a service or feature is unlocked the tutorials relevant to them will be added. Tutorials can be turned on and started at any point, even after a city has grown to a larger size. Tutorials provide information on what’s new and how old and improved services work. With the tooltips and panel information you can either take a quick look or a deep dive into how things function in the game.
That concludes our behind-the-scenes development diaries. We hope you enjoyed this look at our goals and philosophy behind certain aspects of the game and a peek at our processes for bringing it all to life. If you’d enjoy more of these, don’t hesitate to let us know what kind of topics you’d love for us to cover. For now, we’ll be counting the hours to release as we’re so excited for you to finally get your hands on Cities: Skylines II.