Development Diary: Map Editor
Hi everyone and welcome back to our Development Diaries! This time we will go over map creation in the Editor in Cities: Skylines II, how it works, and what you can do in the first iteration of it.
When we set out to create the Map Editor we wanted it to be similar to the one in Cities: Skylines but we also wanted to expose more properties, giving more power and freedom to you so you can express your vision. The basic principle of the Editor is that it should be both easy to use and flexible so that we can expand upon it in the future. This is the same tool we developers have used to create the maps for the base game.
One of the cool features of the Editor’s map creation is the scale of the map and that you can fine-tune just about anything in the map. We have already seen some amazing maps created with the hidden and unfinished version of the Map Editor, so we can’t wait to see what kind of incredible creations you create with the finished version.
SHAPING THE EARTH
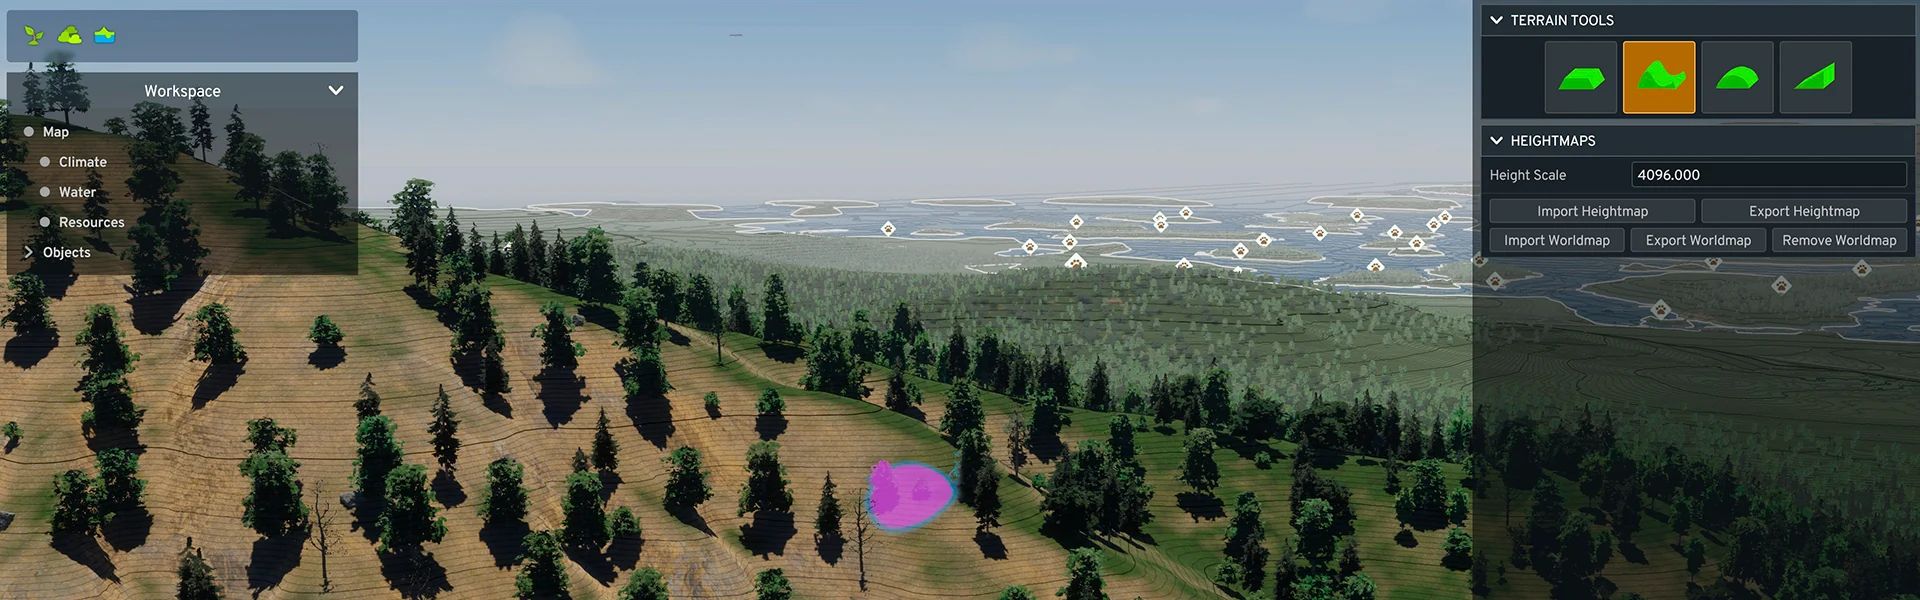
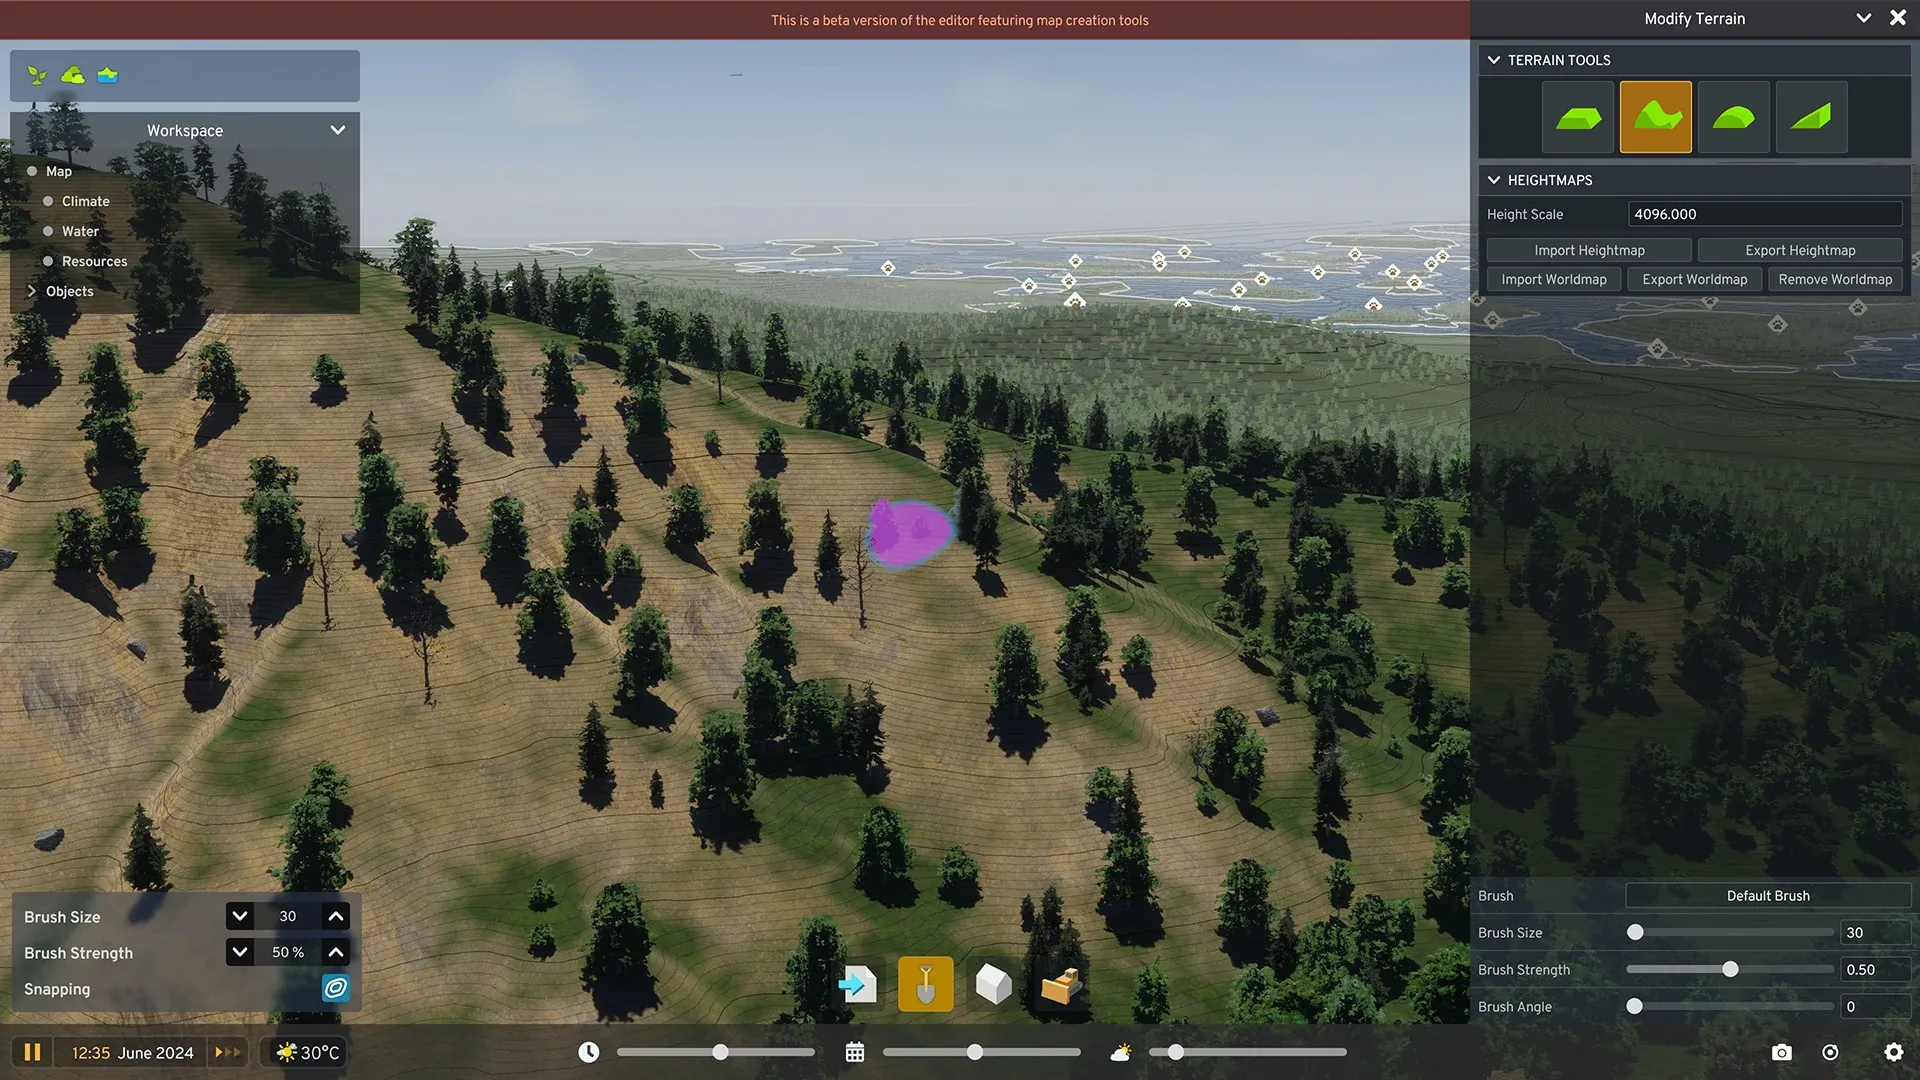
Map-making wouldn’t be anything without the tools to adjust, modify, and shape the terrain. You can import and export heightmaps just like in the previous game, and you can also use the familiar terrain tools to bend the terrain to your imagination. These important tools can be found in the main tool areas at the bottom of the screen, imaginatively shown with the shovel icon. From this menu, you can make all the necessary adjustments to the terrain.
 Let the fun begin!
Heightmaps exported from the Editor are placed in C:/Users/%username%/AppData/LocalLow/Colossal Order/Cities Skylines II/Heightmaps/ and that’s also where you place any heightmaps you wish to import to the Editor. Heightmaps should have a resolution of 4096×4096 pixels, be grayscale, and 16-bit color channel depth images of .png or .tiff format.
The heightmaps only apply to the playable area, but you can also optionally import an extended world map, which contains both the playable area and the surrounding unplayable world. The World Map should have the same resolution and format as the base heightmap, with the center 1024×1024 area matching the base heightmap.
 Mold the terrain to fit your vision
WORKING THE SPACE
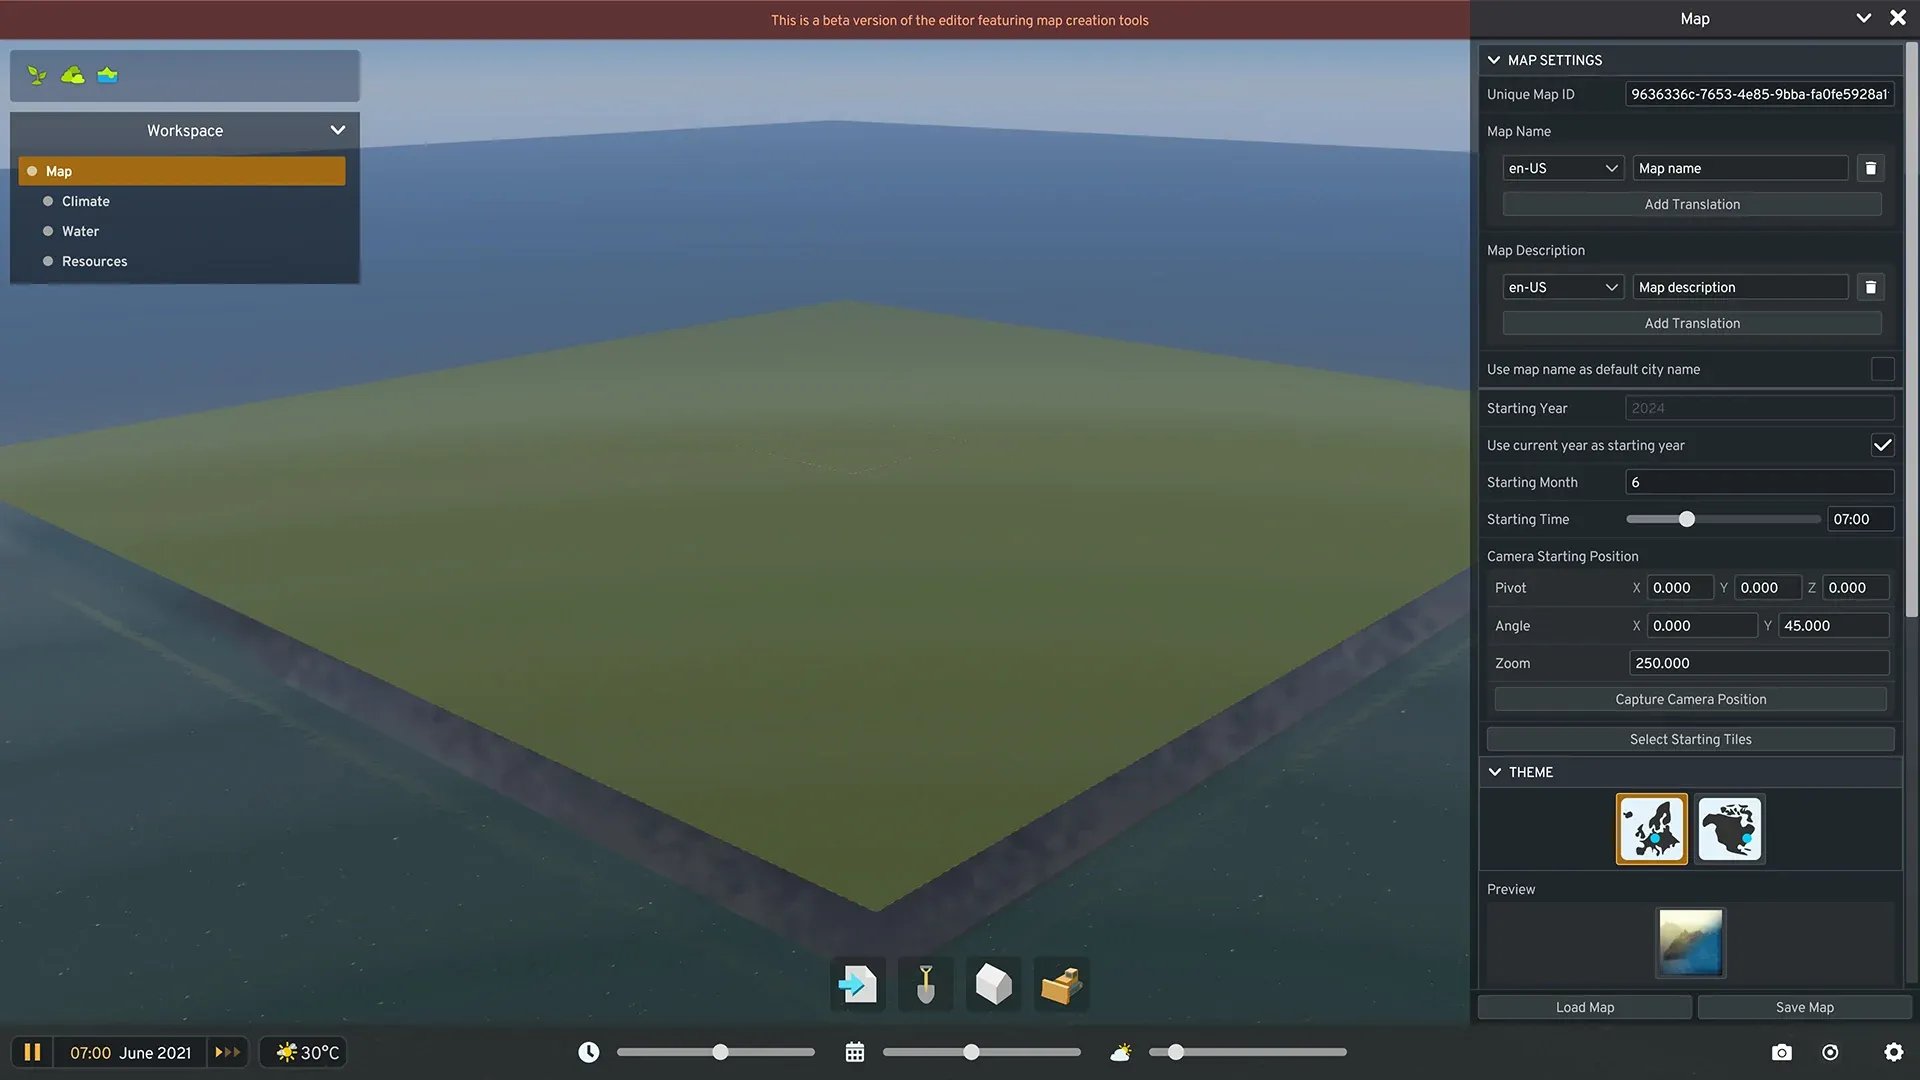
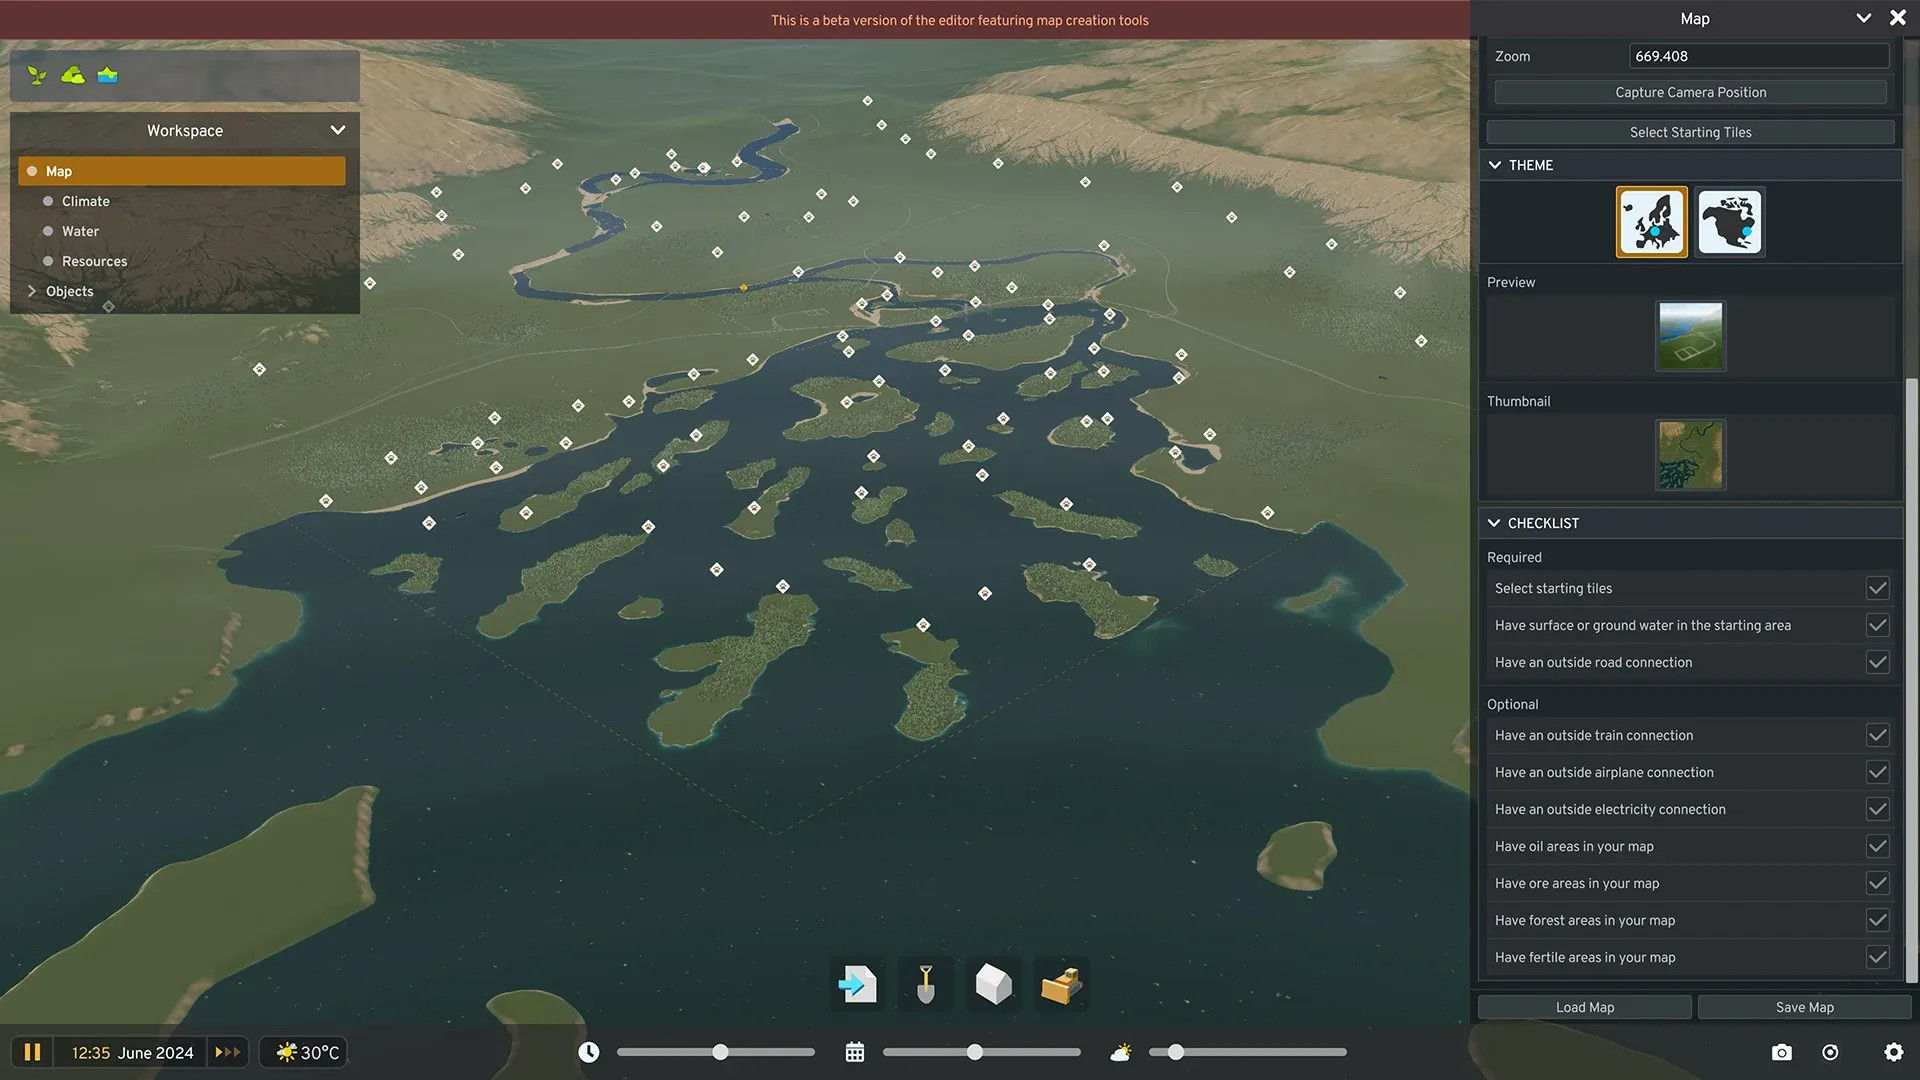
The workspace is the landing page for the Editor. From here you can start working on making your vision come to life. The “Map” item contains the basic items for the map, such as the Map Name, Map Description, and Theme – among many other settings. You’ll also notice that it has the same workspace functions as the environment for editing assets in the game, more on that in a future development diary. You can easily see how the map will look during different times of the day, month, or weather by using the sliders at the bottom. A few specific info views can be enabled at the top-right of the screen to provide an easy overview of for example the resources on the map.
The editor has pre-made Climate settings that govern how the weather simulation works on the map. You can select any of the Climates used for the base game maps and apply it to your newly created map. We’re also working on exposing custom Climate settings in future updates to the Editor so that you can design the Climate of the map freely – more on that in the future.
Water is a very important cornerstone when it comes to creating maps, and we have set out to improve the Water sources greatly from the first game. In the Water Settings, you can find different Water Source types. You can freely add and modify these as you please, to fit your vision.
Let’s go briefly over them and how they function:
- Constant Rate Water Sources generate a constant amount of water, and they are good for the start of rivers or streams that start inside the playable area.
- Constant Level Water Sources generate water to specific heights. They are excellent when creating lakes.
- Border River Water Sources need to be located on the edge of the playable area; this water source generates a flow of water that will flow off the map, or from outside the playable area.
- Border Sea Water Sources need to be located on the edge of the playable area and create a water source that generates a flow of water that will flow off the map, or from outside the playable area on a much larger scale than Border River Water Source.
To see the results of the Water Simulation you can adjust the Water Simulation Speed separately from the time simulation, but please note that a higher simulation speed will affect the performance! It’s also a good idea for the water simulation to run for a while before saving the map, so there are no surprises.
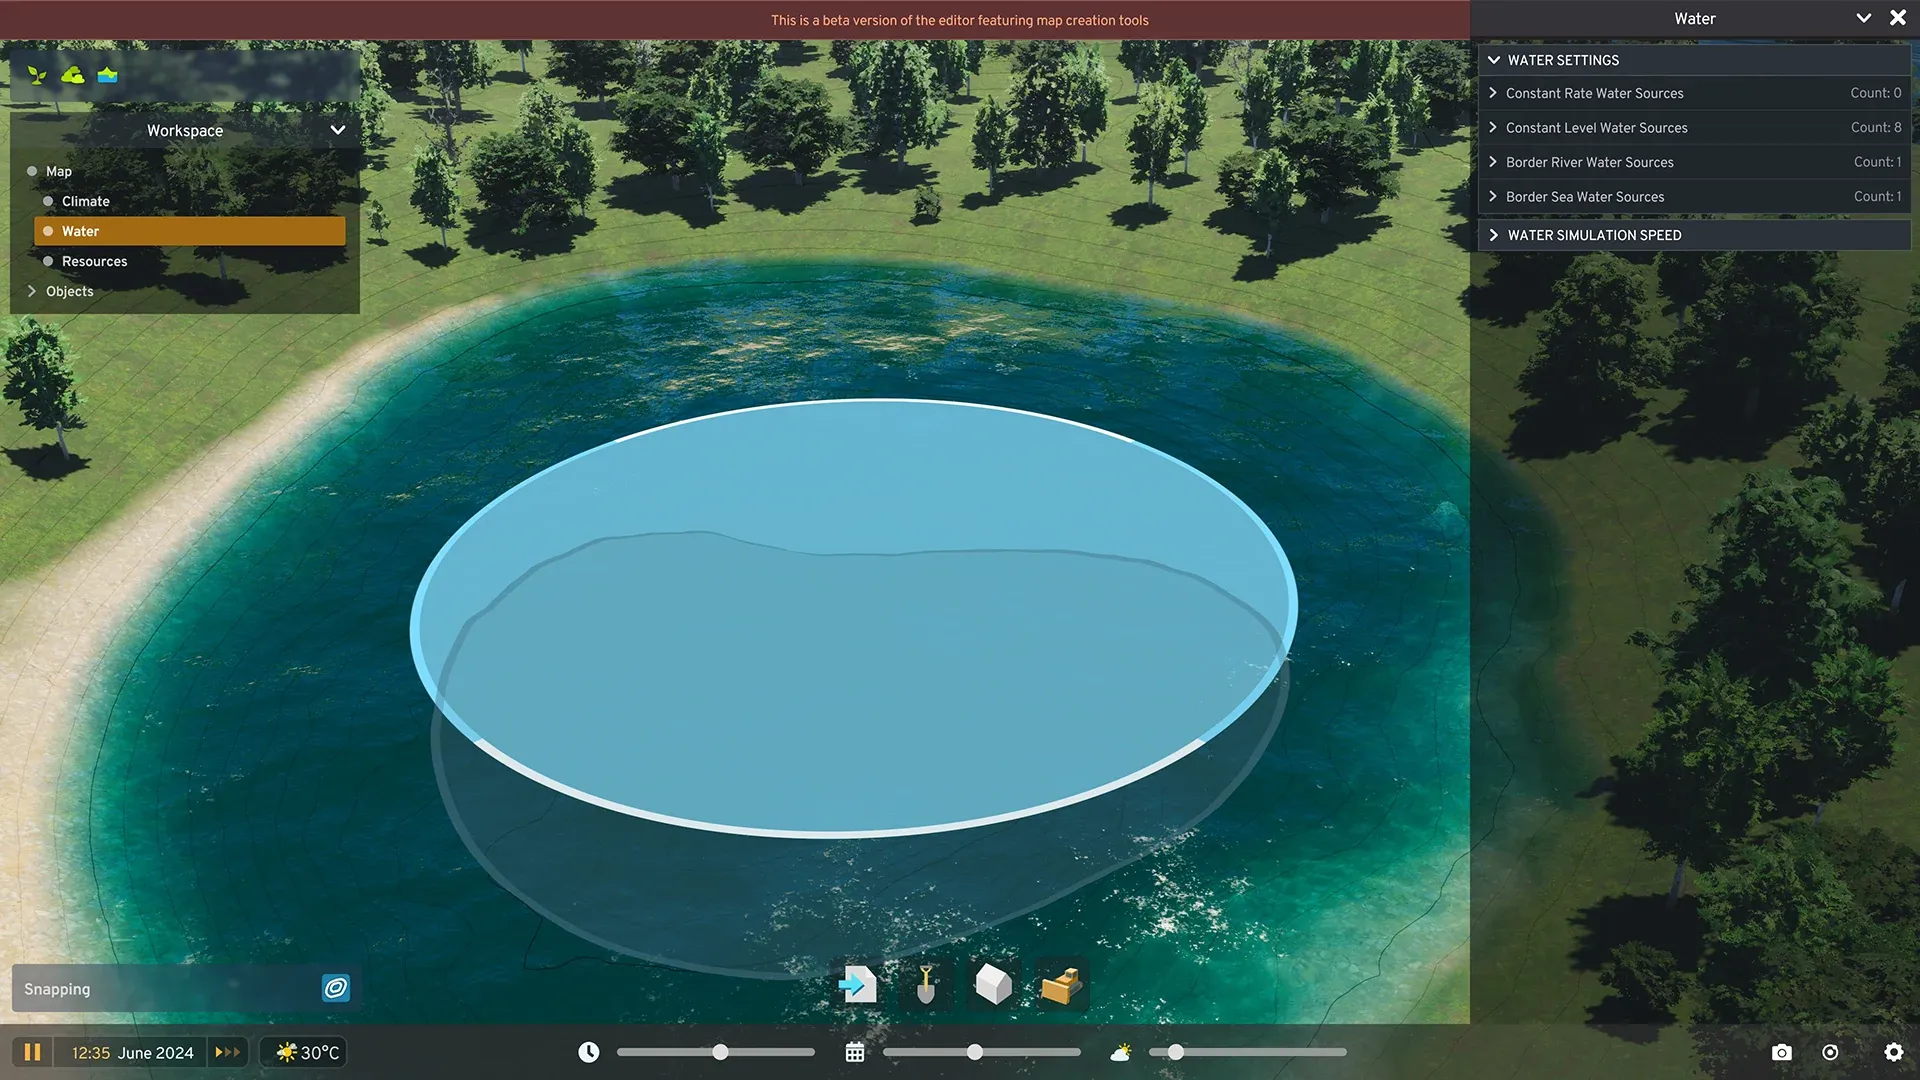 Grab the top or bottom edges of the water source to raise or lower it, or the sides to scale it up or down
The last of the Workspace items is the Resources, which works very similar to how you added recourse in Cities: Skylines, except that this time you can create your own Underground Water Deposits in addition to areas rich in oil, ore, and fertile land. To keep the experience consistent all of them can be created with the same Brush tools, and as you would expect, these are the resources that can then be extracted in-game. But if you don’t enjoy painting directly on the map, you can also add resources by importing a greyscale 256×256 map. Use white to add the specific resource and black where you want none of it.
CREATING CONNECTIONS
Once you have shaped the land to your liking it’s time to create the infrastructure and outside connections, so future cities can grow in the environment you created. These work a bit differently compared to the original Cities: Skylines because we have one unified editor for everything.
To create roads or other decorations on the map you have to access the “Add Object” menu which is located next to the Terrain tools. From here you can search for any asset located in the game or browse through the different categories. Placing the selected asset works the same way as it does in-game. For example, if you have selected a highway you can use the robust road building tools to create the highway network just the way you want. Once the asset is placed it will appear in the Workspace, where it can be even further adjusted and modified to your liking. Make sure you have a highway that reaches all the way to the edge of the map and into your starting tile, so citizens can arrive in the city. You can find a handy checklist of items that ensure your map will work at the bottom of the map settings on the right.
“Add Object” also allows you to place decorative objects like trees, rocks, and old barns or houses to give your map a more alive and personal touch. Additionally, you can add all objects available in the game, however, they are not all suited for maps, so always consider how an item functions before adding it to your creation to avoid any issues. As an example, we have used a variety of props, decorations, and gravel roads to mimic rural areas on the map.
This is all for today’s Development Diary, we hope it gives you a good sense of how map creation works in Cities: Skylines II, and can’t wait to see what you are able to create with the Editor!
 A final look at a finished map