Development Diary: Ports
Welcome back to the second Bridges & Ports development diary. We covered our motivation for the expansion’s theme and the new bridges it includes in the first diary, “Bridges,” found in this post. Today is all about the Port and its many upgrades. If you have dreamt of quays lined by cranes and container stacks as far as the eye can see, you’re in for a treat! But the Port can be so much more than that. With its various storage upgrades, you can customize it to match the area it serves, whether that’s an offshore oil industry, a small fishing town, or a dryport in the mountains servicing your mining areas. Or you can take it in a different direction entirely with the Passenger Terminal and combine it with the new waterfront businesses, parks, and ferries to make it the beating heart of a holiday destination city. The choice is yours.
We will go through the different parts that make up the Port, how they are unlocked, where to find them, and what you can do with them, so you’re ready to customize your coastlines when Bridges & Ports is released on the 29th of October. And without further ado, let’s get started.
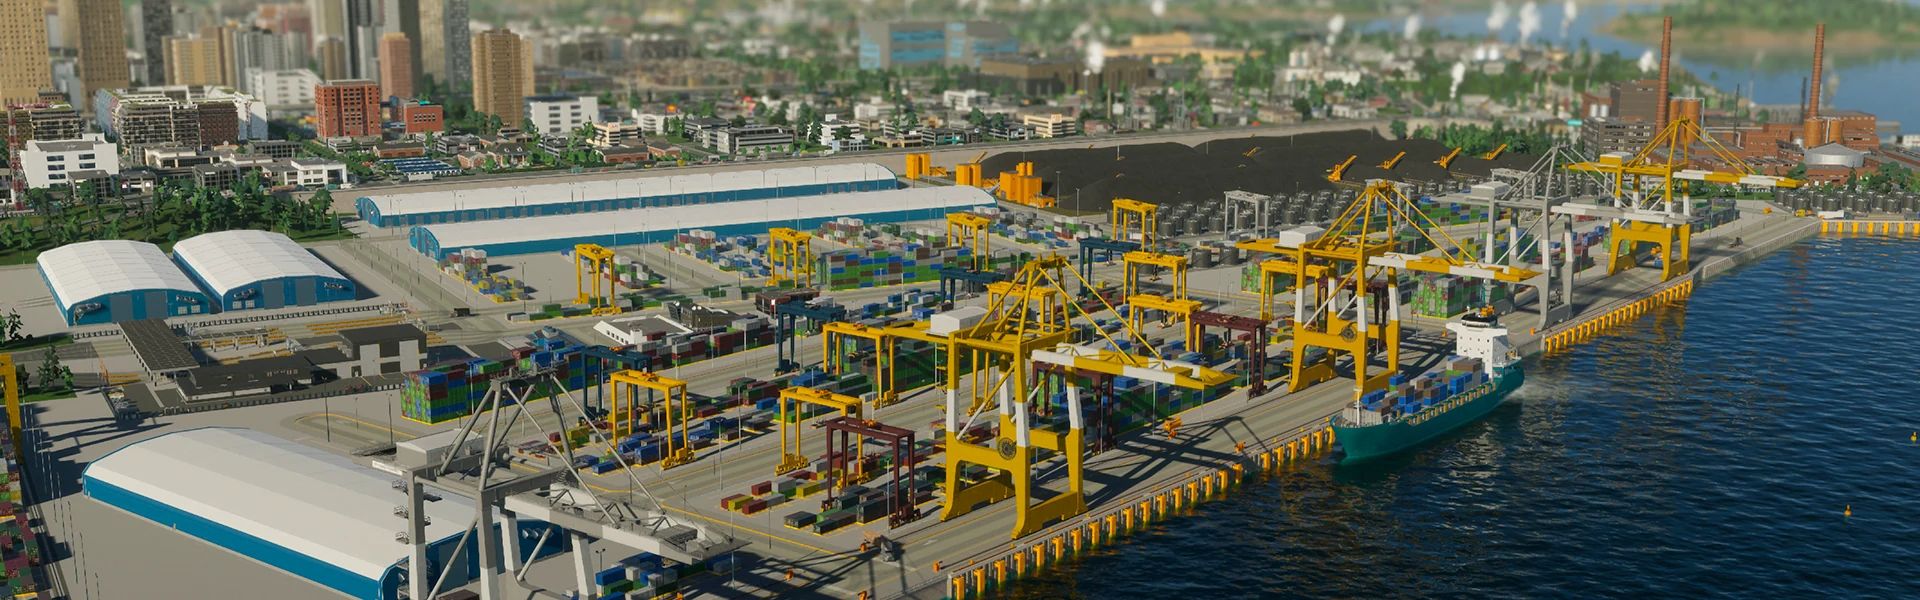
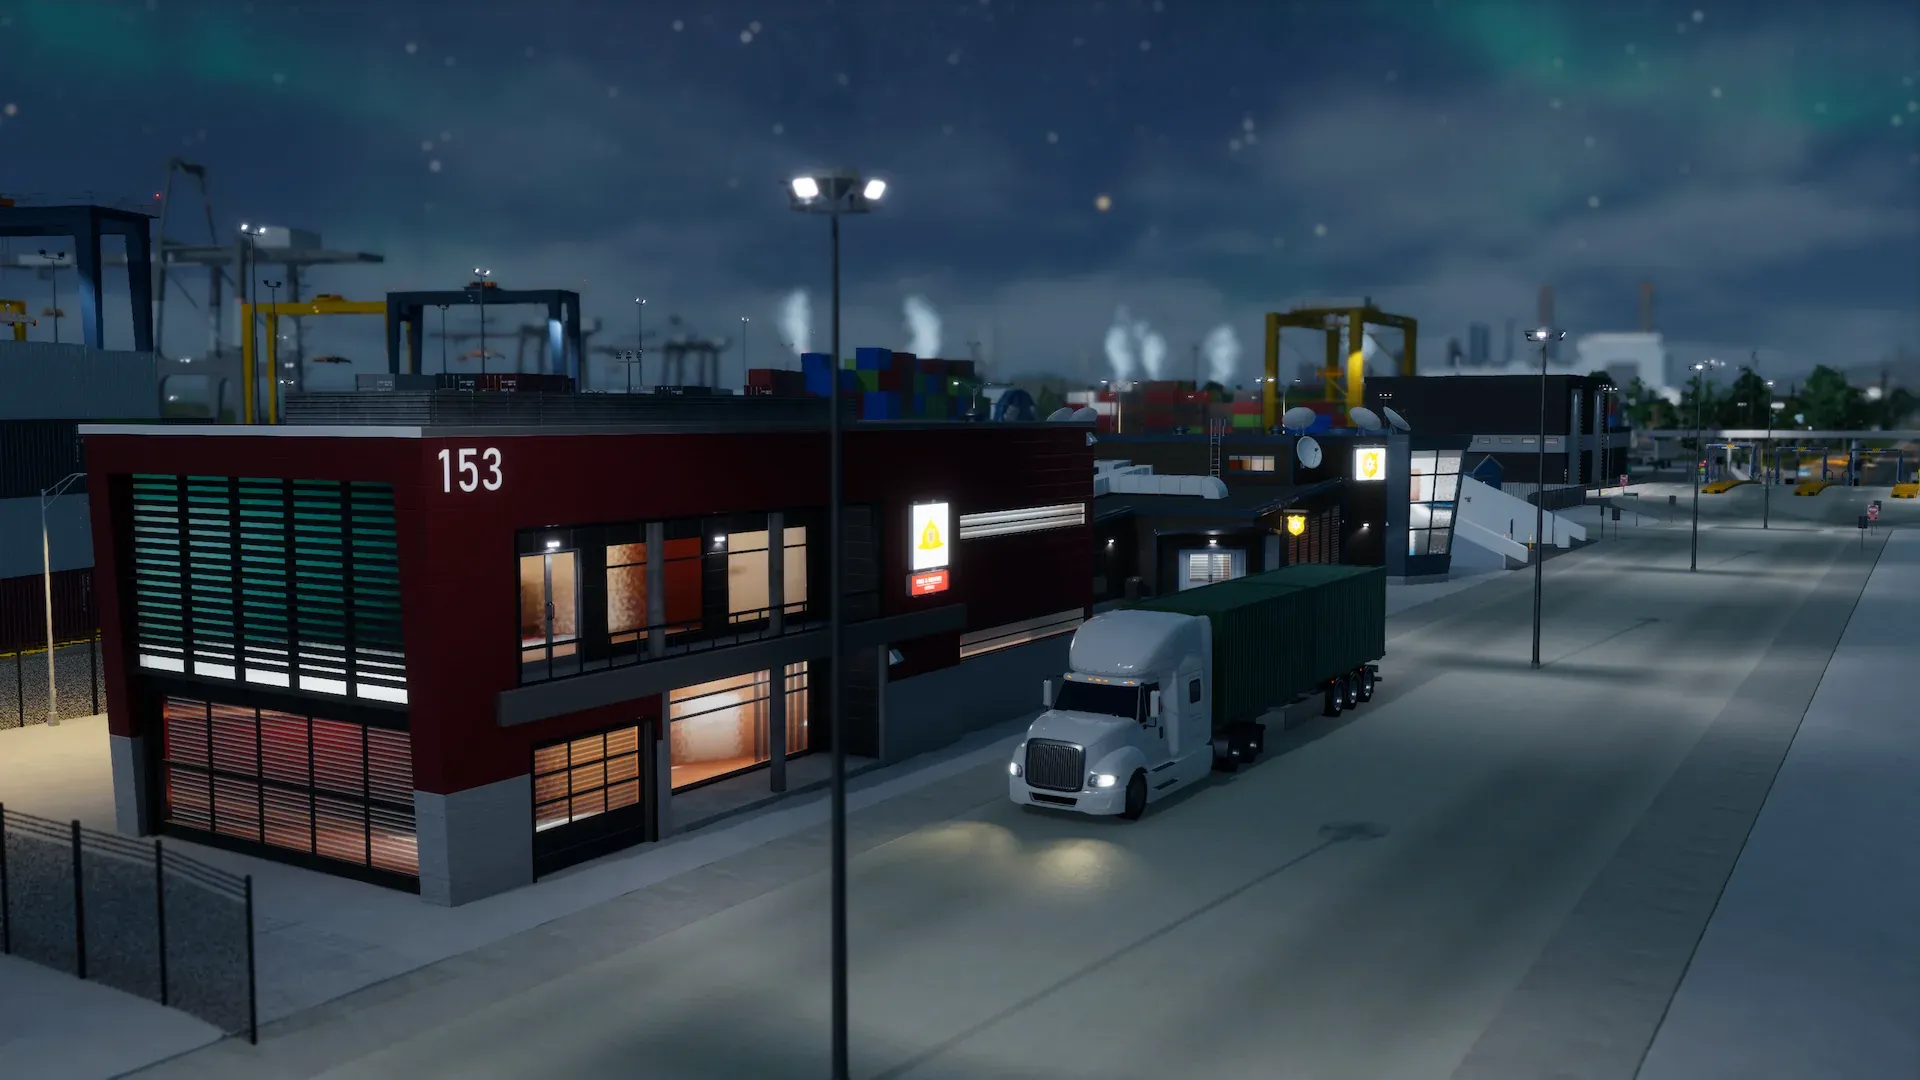
 The flexibility of the Port lets you build a harbor that fits your unique city.
THE GATE IS JUST THE BEGINNING
No matter what type of port you set out to build, they all start with a main gate. Once you have unlocked the Water Transportation Menu, you have access to the Small Port, Medium Port, and Large Port. Each size varies not only in cost and building footprint but also in the amount of traffic they can support and the building upgrades, specifically extensions, each has available – more on those later in this development diary. While you can expand your port with Auxiliary Gates to create more entry points to the port and distribute traffic, you cannot change the Port main gate once you start building your port, so choose wisely.
Once you place your Port gate in a suitable location, select it to open the Upgrades Menu to see everything you can build. Right away, many of the upgrades are locked, at least if you don’t play with Unlock All enabled, as they require you to ship certain amounts of cargo to unlock them. But fret not, you have everything you need to get started shipping cargo in and out of your city: Four different small storage facilities to store your cargo, a Cargo Crane to load and unload your cargo ships, a Port Quay to place your crane on, a Seaway to connect your port to the outside world, and a Cargo Ship Route to bring in ships importing and exporting cargo.
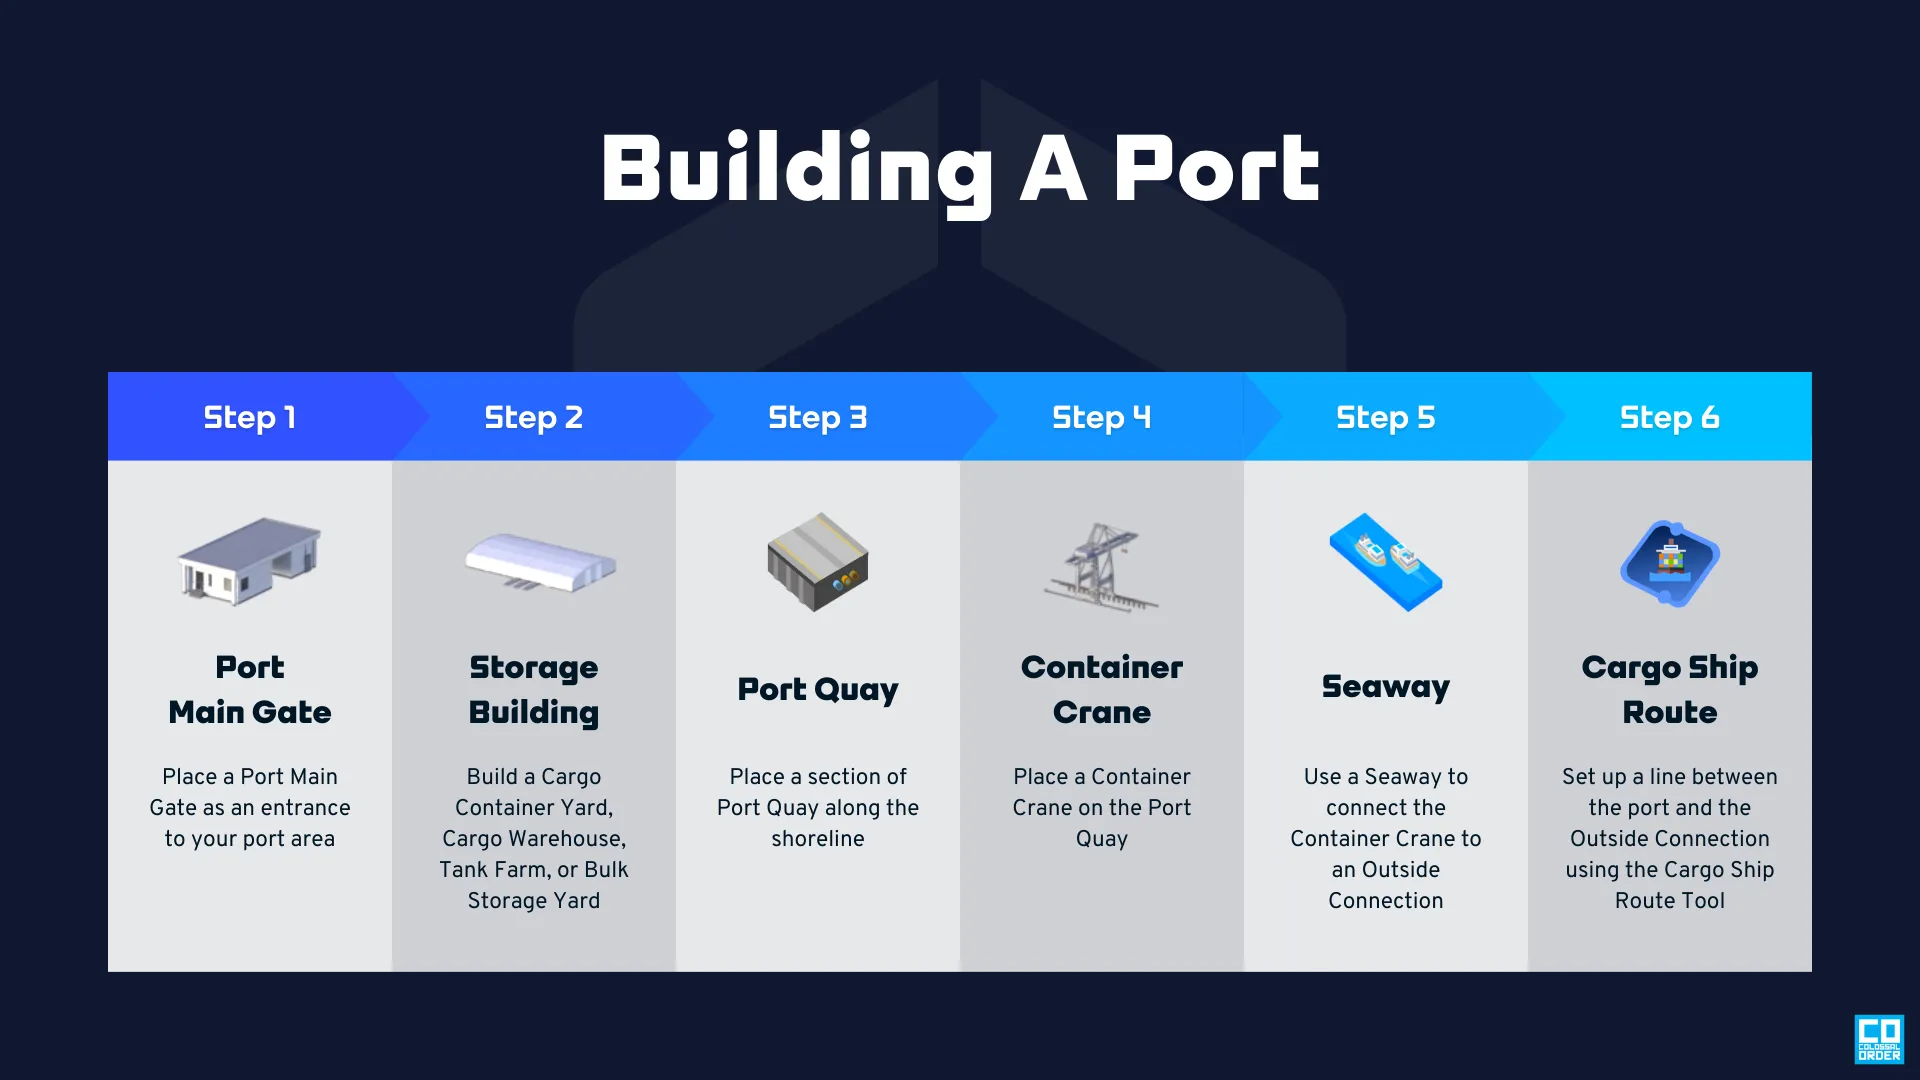 In just six steps, you have built a custom port that is ready to import and export cargo.
You do not have to follow the steps outlined above exactly in that order. For example, you may want to line the shore with Port Quays, which can also be found in the Water Transportation Menu, if defining the shape of your port is the best starting point for you. Or you might decide to add the storage facilities last instead of immediately after placing your Port gate. You just need to keep in mind that the upgrades must be placed within a 1 km radius of the Port gate.
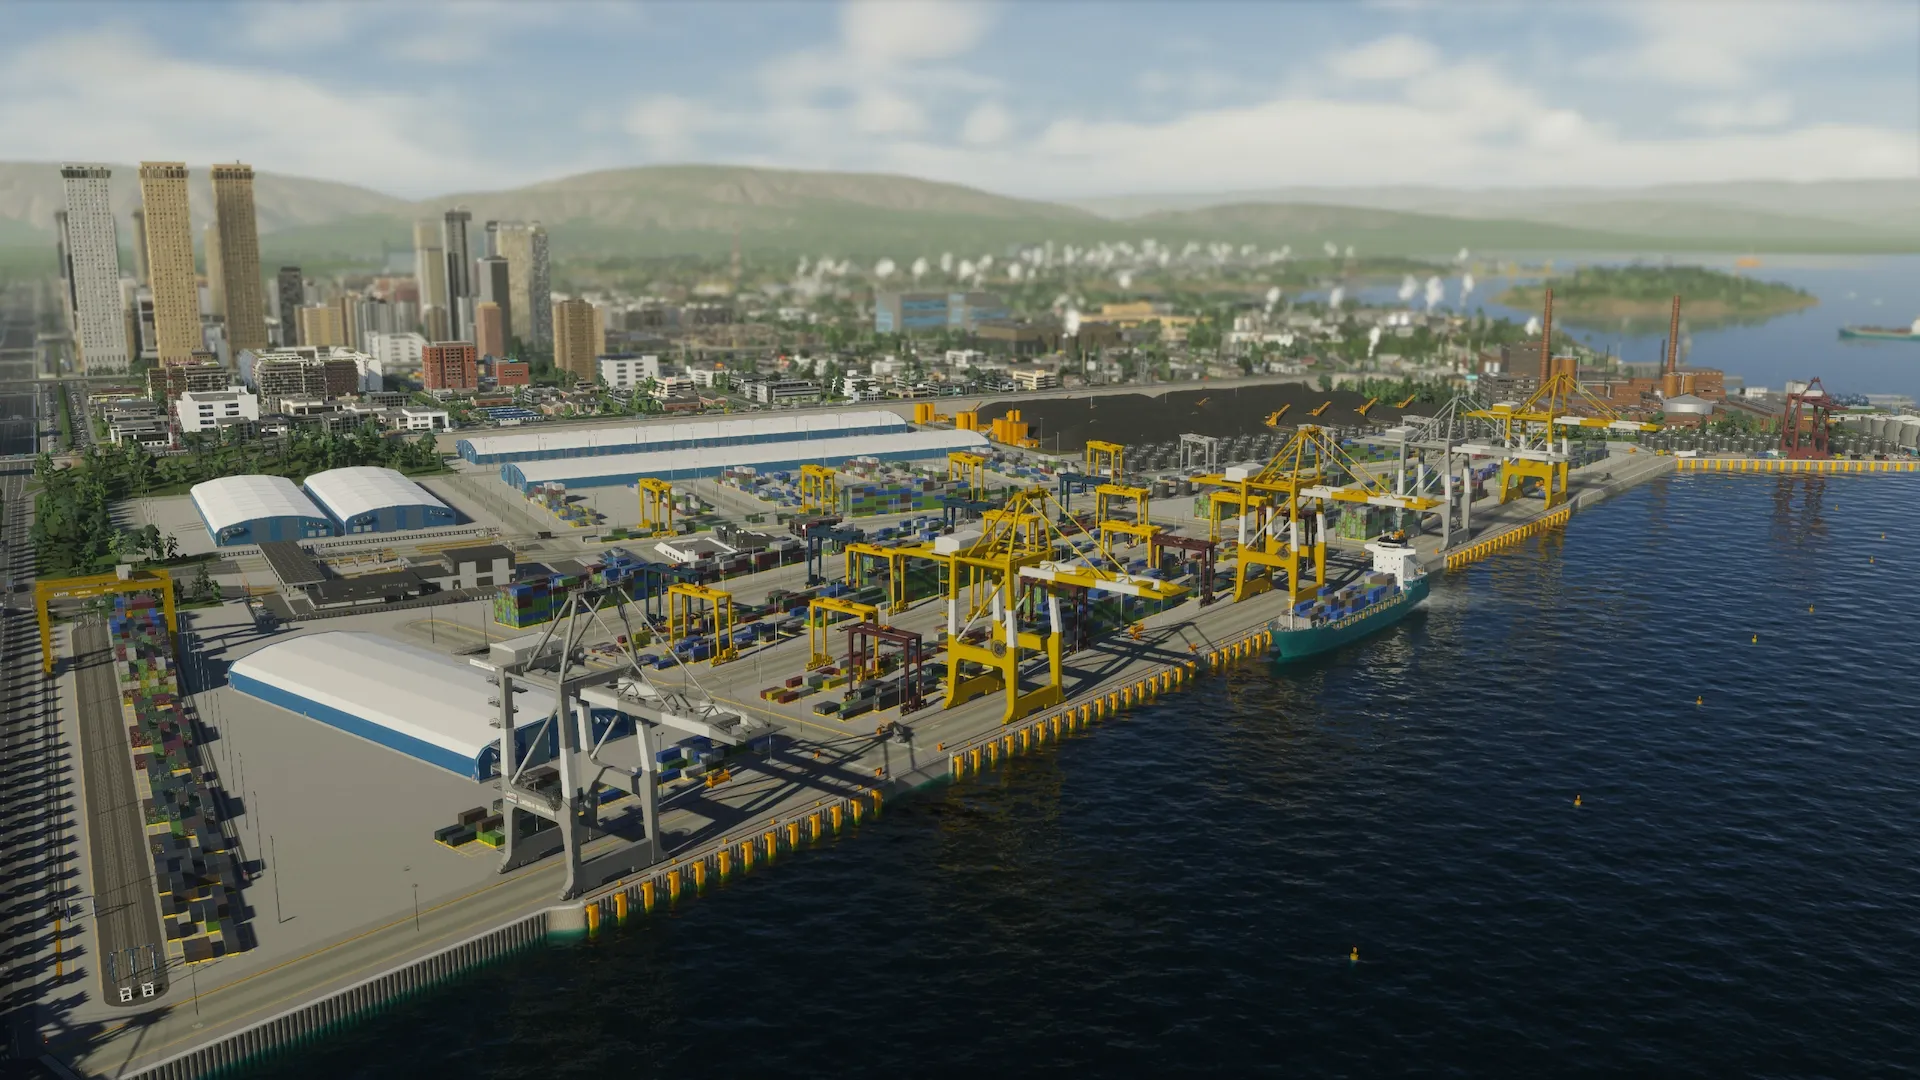
 While there are limits, the Port complex can be very large, and you can always build another next to it if needed.
RUNNING A TIGHT SHIP
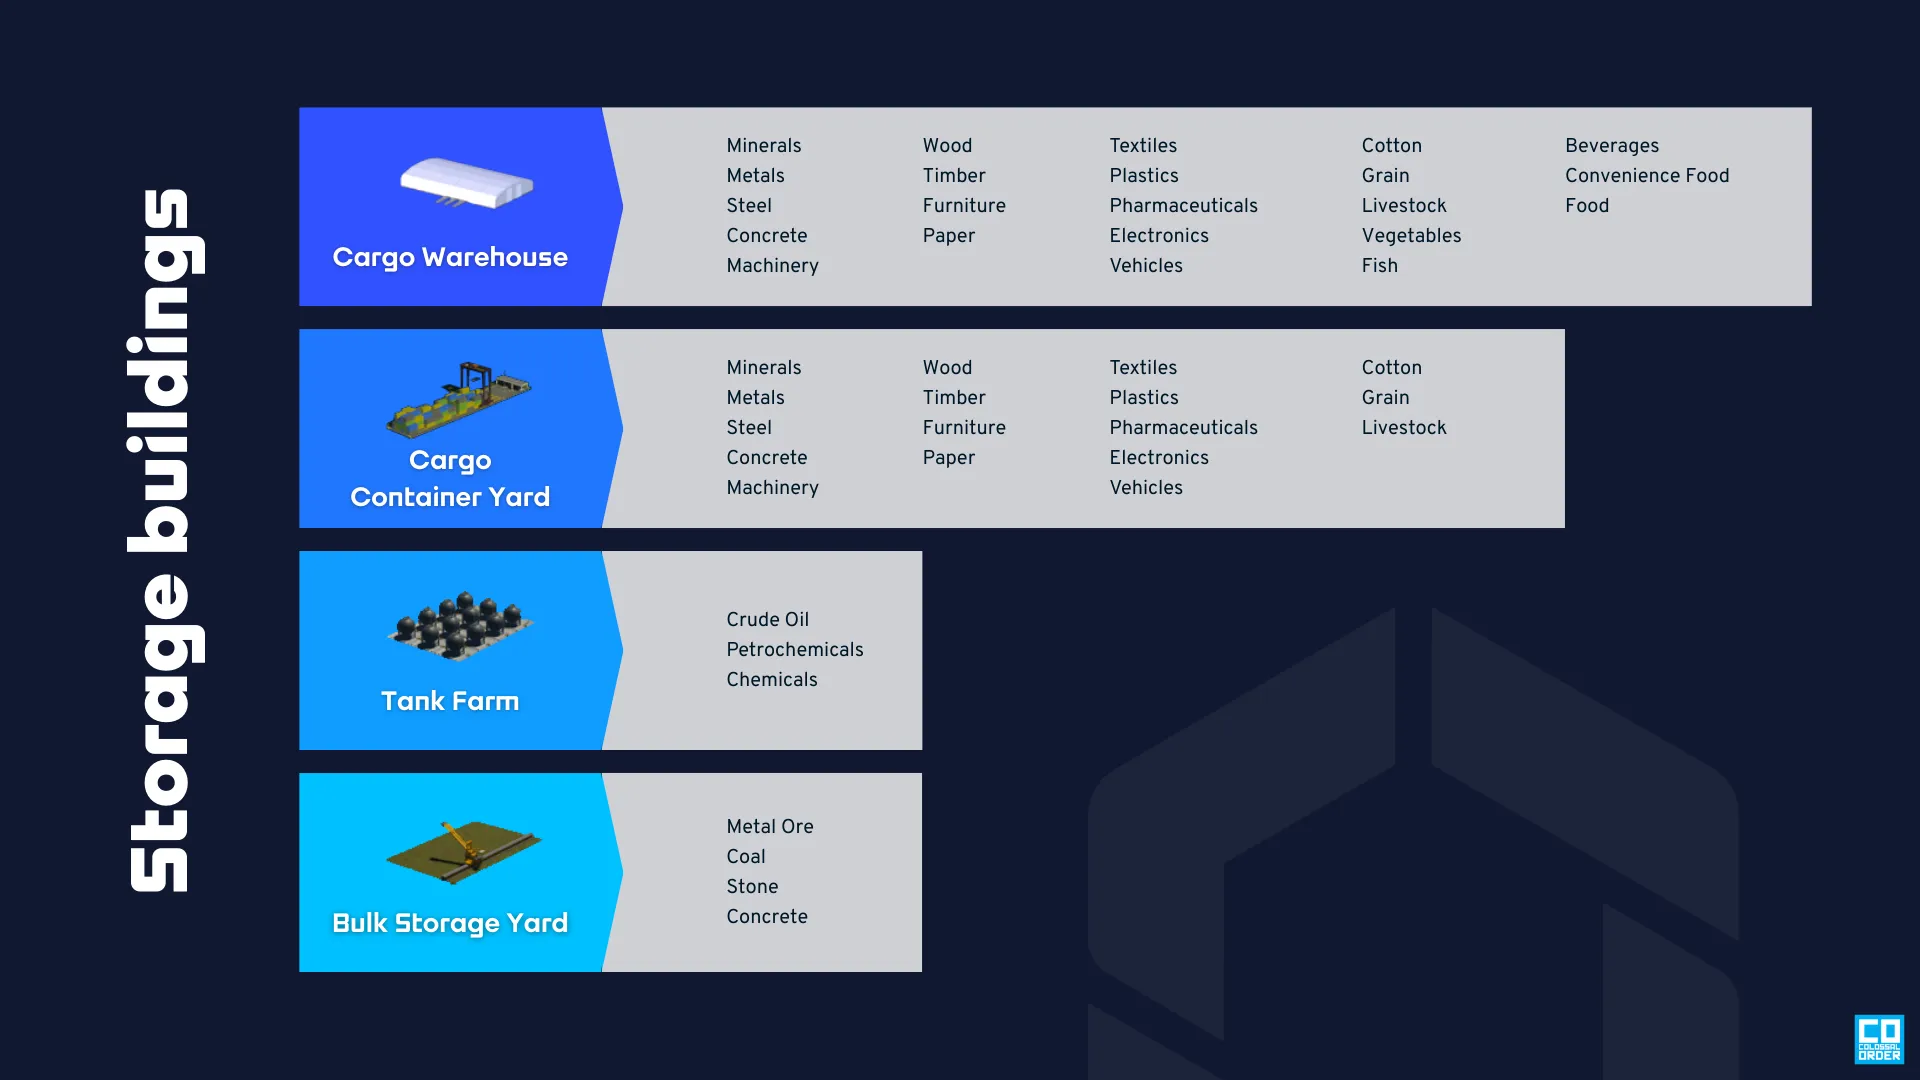
A port needs storage to be functional, and while every storage facility adds to the port’s overall capacity, they are tied to different resources. This enables you to specialize your port with, for example, Tank Farms, which only store oil, petrochemicals, and chemicals, or diversify your harbor with a combination of some or all options. There are four different types of storage facilities: Cargo Warehouses, Cargo Container Yards, Tank Farms, and Bulk Storage Yards, which all come in Small, Medium, and Large sizes.
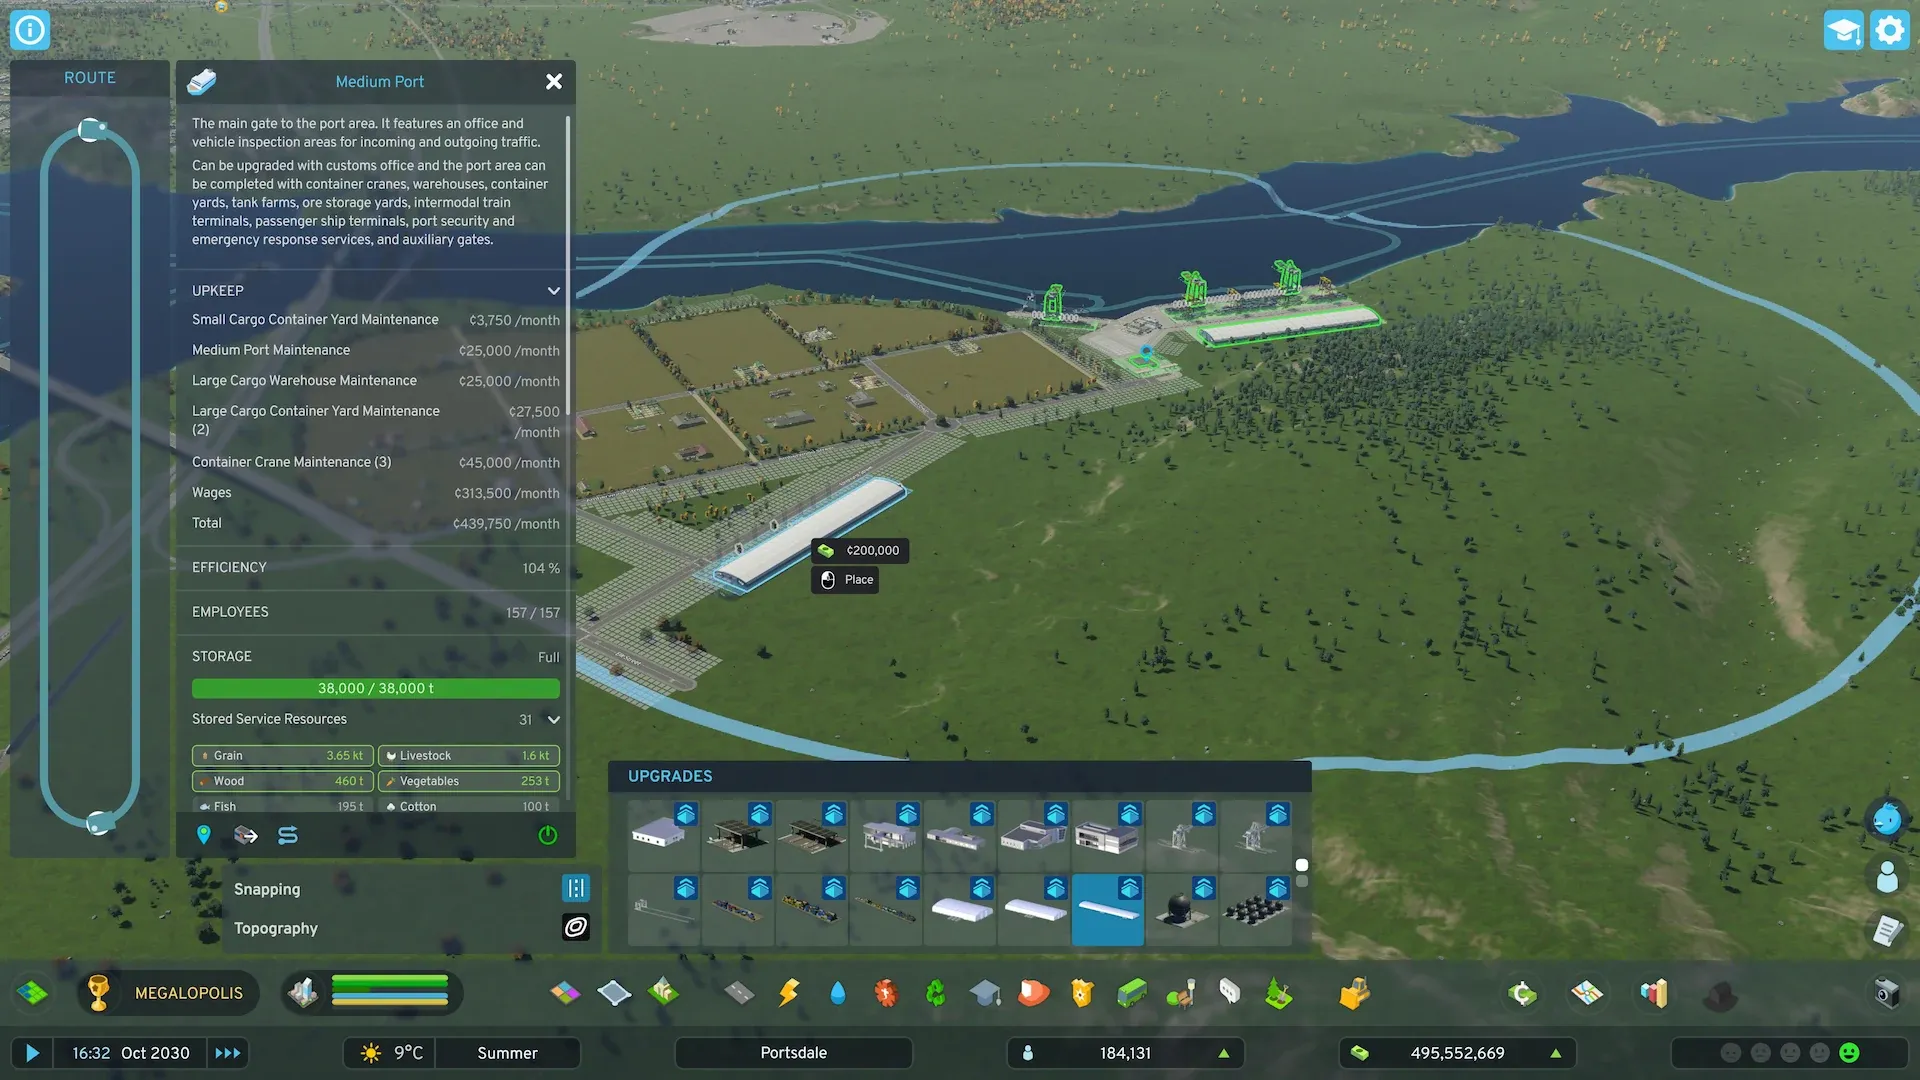
 To see all the resources your port can and has stored, all you need to do is select the Port main gate.
With a storage facility in place, your port is now open for business, meaning trucks can start to deliver and pick up cargo. While trucks can enter the port and reach the storage facility using any available road, all depending on which has the lowest pathfinding cost, the key to running an efficient port is the Gates. Gates control traffic in and out of the port, and bypassing them with a non-gated road results in a 50% reduction in Efficiency. When you first build a port, you have just the Port main gate, but as you ship more cargo through the port, Auxiliary Gates unlock, allowing you to add multiple entry points to the area, ensuring full Efficiency and smooth traffic in and out.
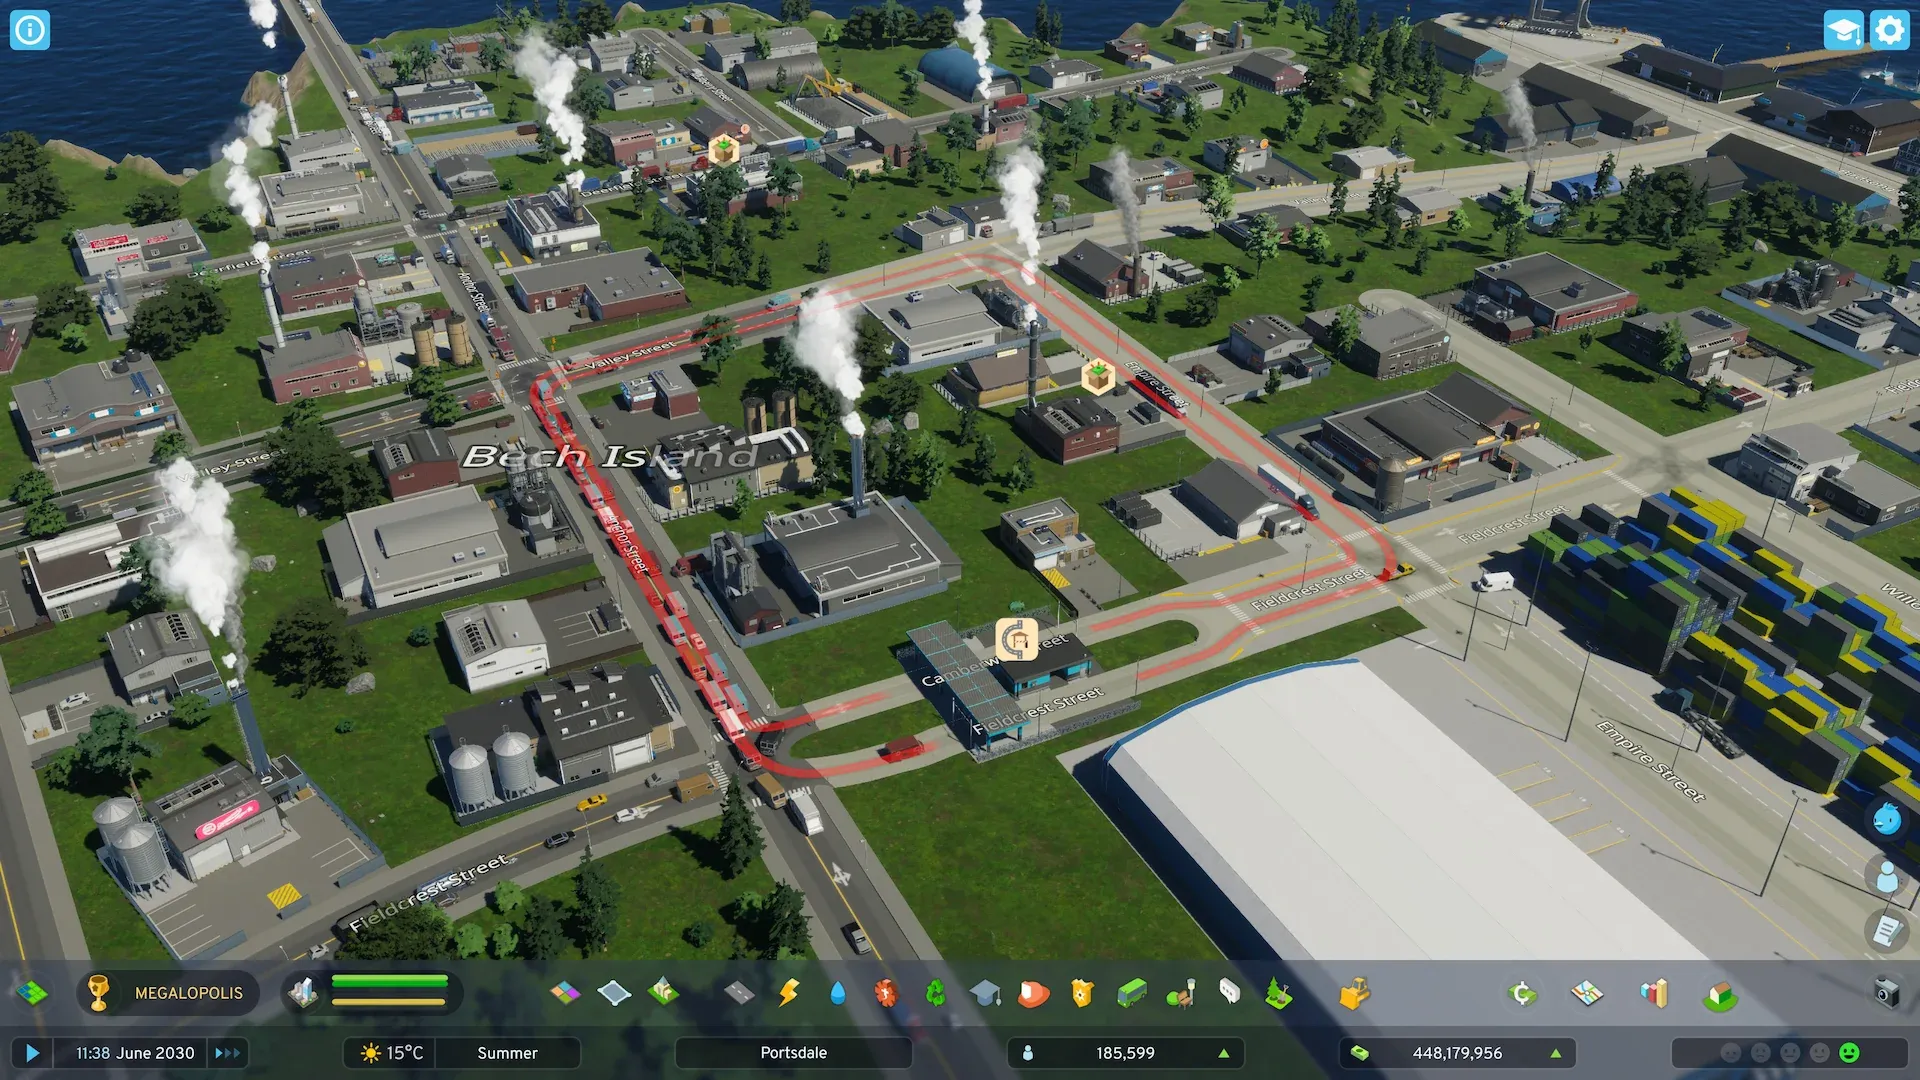 The new notification warns you if a bypass into the port exists.
To unlock all upgrades, you need to transport a lot of cargo via ships. While one Cargo Crane and one Ship Route can certainly get the job done, you can add as many cranes along the quay as you can fit. The Cargo Crane serves as a place for Cargo Ship Routes to stop, and while several lines can share a stop, more stops let your ships dock at the same time, meaning more cargo can be shipped in and out simultaneously.
However, trucks and ships aren’t the only traffic visiting the port. Once you have your port up and running, you will see a new type of vehicle driving around the port: the Reach Stackers. These specialized vehicles are designed to transport cargo containers around the port, and as they are wider than other vehicles, they are only allowed to drive on the new Port Roads. These special roads can be found in both the Port Upgrade Menu and the Water Transportation Menu. If you prefer to use normal roads in either most or just part of your port, you can absolutely do that. Cargo is still transported to and from ships and storage facilities, even if your Reach Stackers cannot get there.
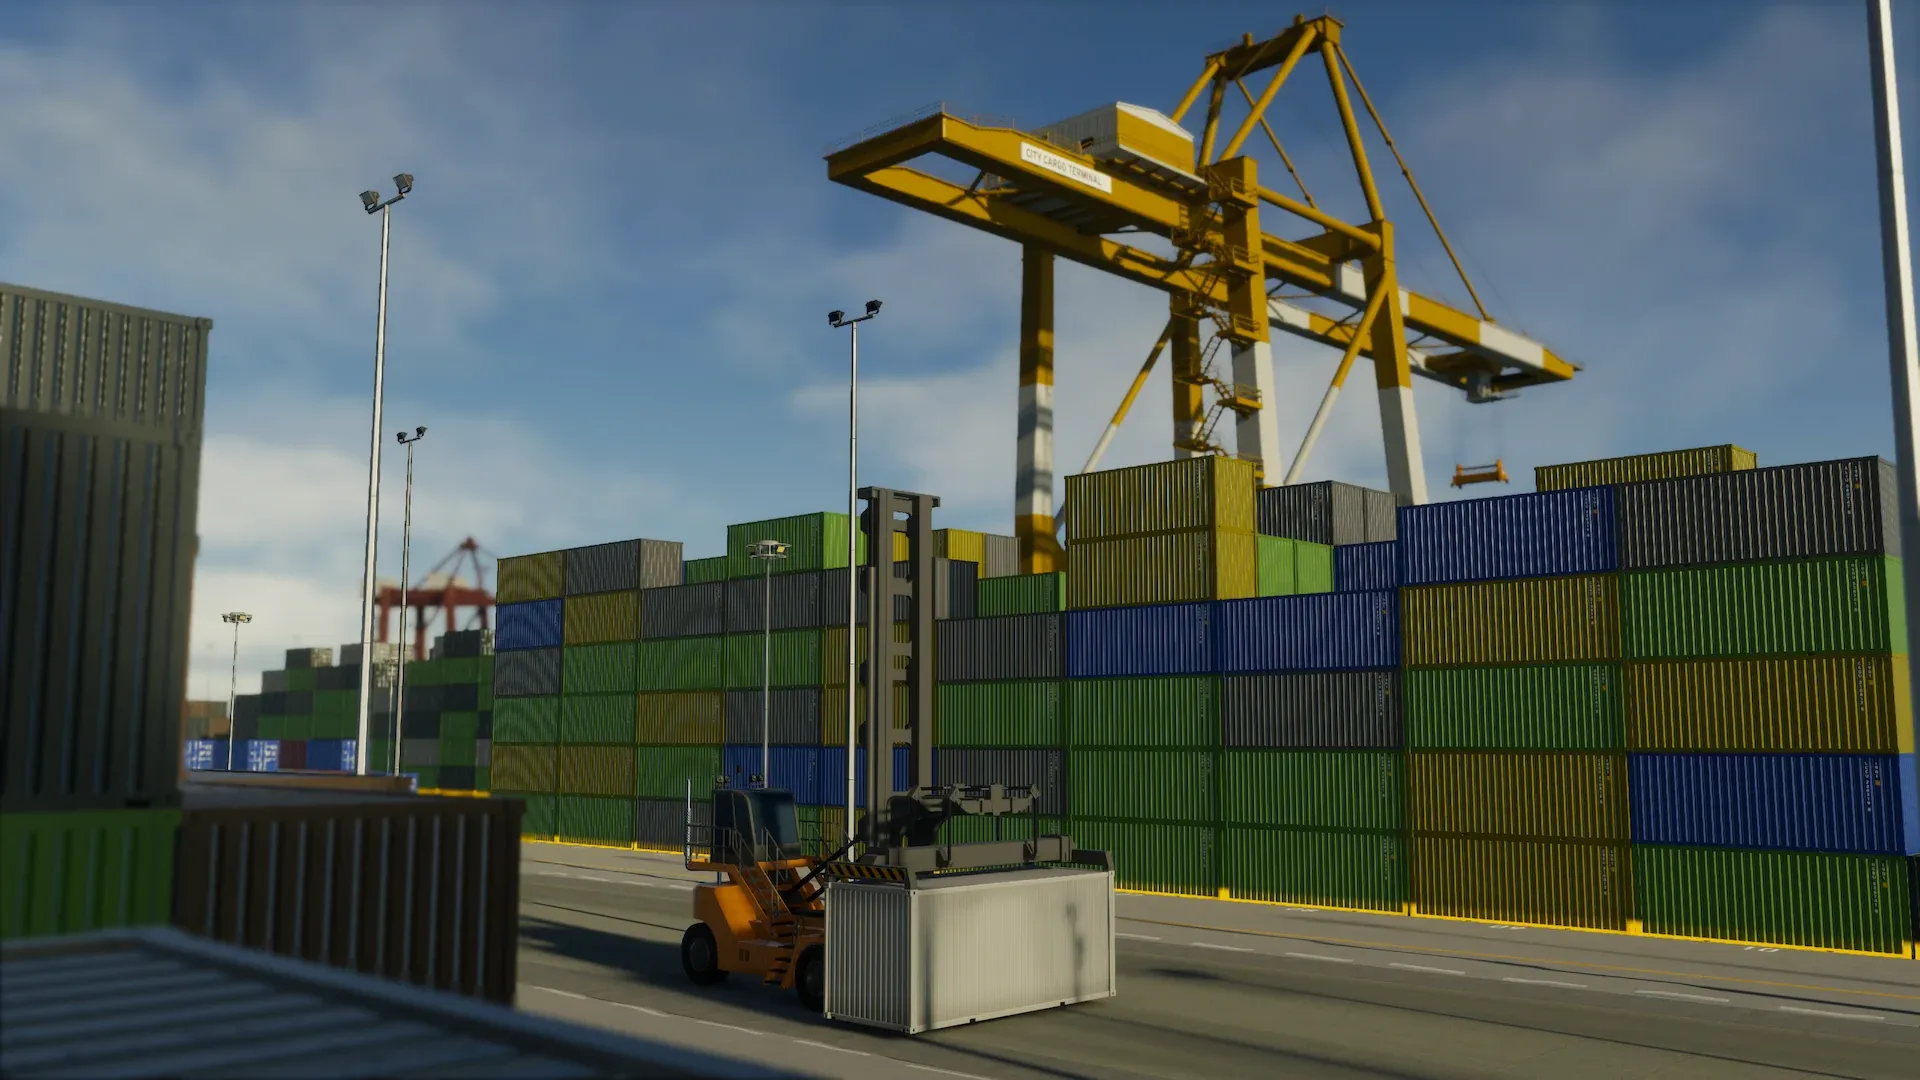 No cargo port is complete without Reach Stackers moving containers back and forth.
UPPING YOUR SHIPPING GAME
Now that we have covered the basics, let’s discuss how you can expand and personalize your Port through its various upgrades. First, we will have a look at Extensions. These are added to the Port main gate, and only the Medium and Large Ports have them. The Medium Port can be upgraded with a Customs Office, which reduces the risk of crime in the Port, but at the cost of lower profit for companies. The Large Port also has the Customs Office, but offers one additional upgrade: The Reach Stacker Garage Extension. This upgrade adds a garage to your Port gate, increasing the speed of loading and unloading cargo for an even more efficient harbor.
Next, we have Sub-buildings, which can be placed anywhere within a 1 km radius of the Port building. All three Port sizes have access to 21 sub-buildings of varying size and function, unlocking as you ship more cargo through your Port. With 12 storage facilities, two cargo cranes, and two auxiliary gates covered in the previous sections, we are left with five sub-buildings to discuss: The Employee Canteen, the Port Security, the Emergency Response, the Intermodal Train Station, and the Passenger Terminal.
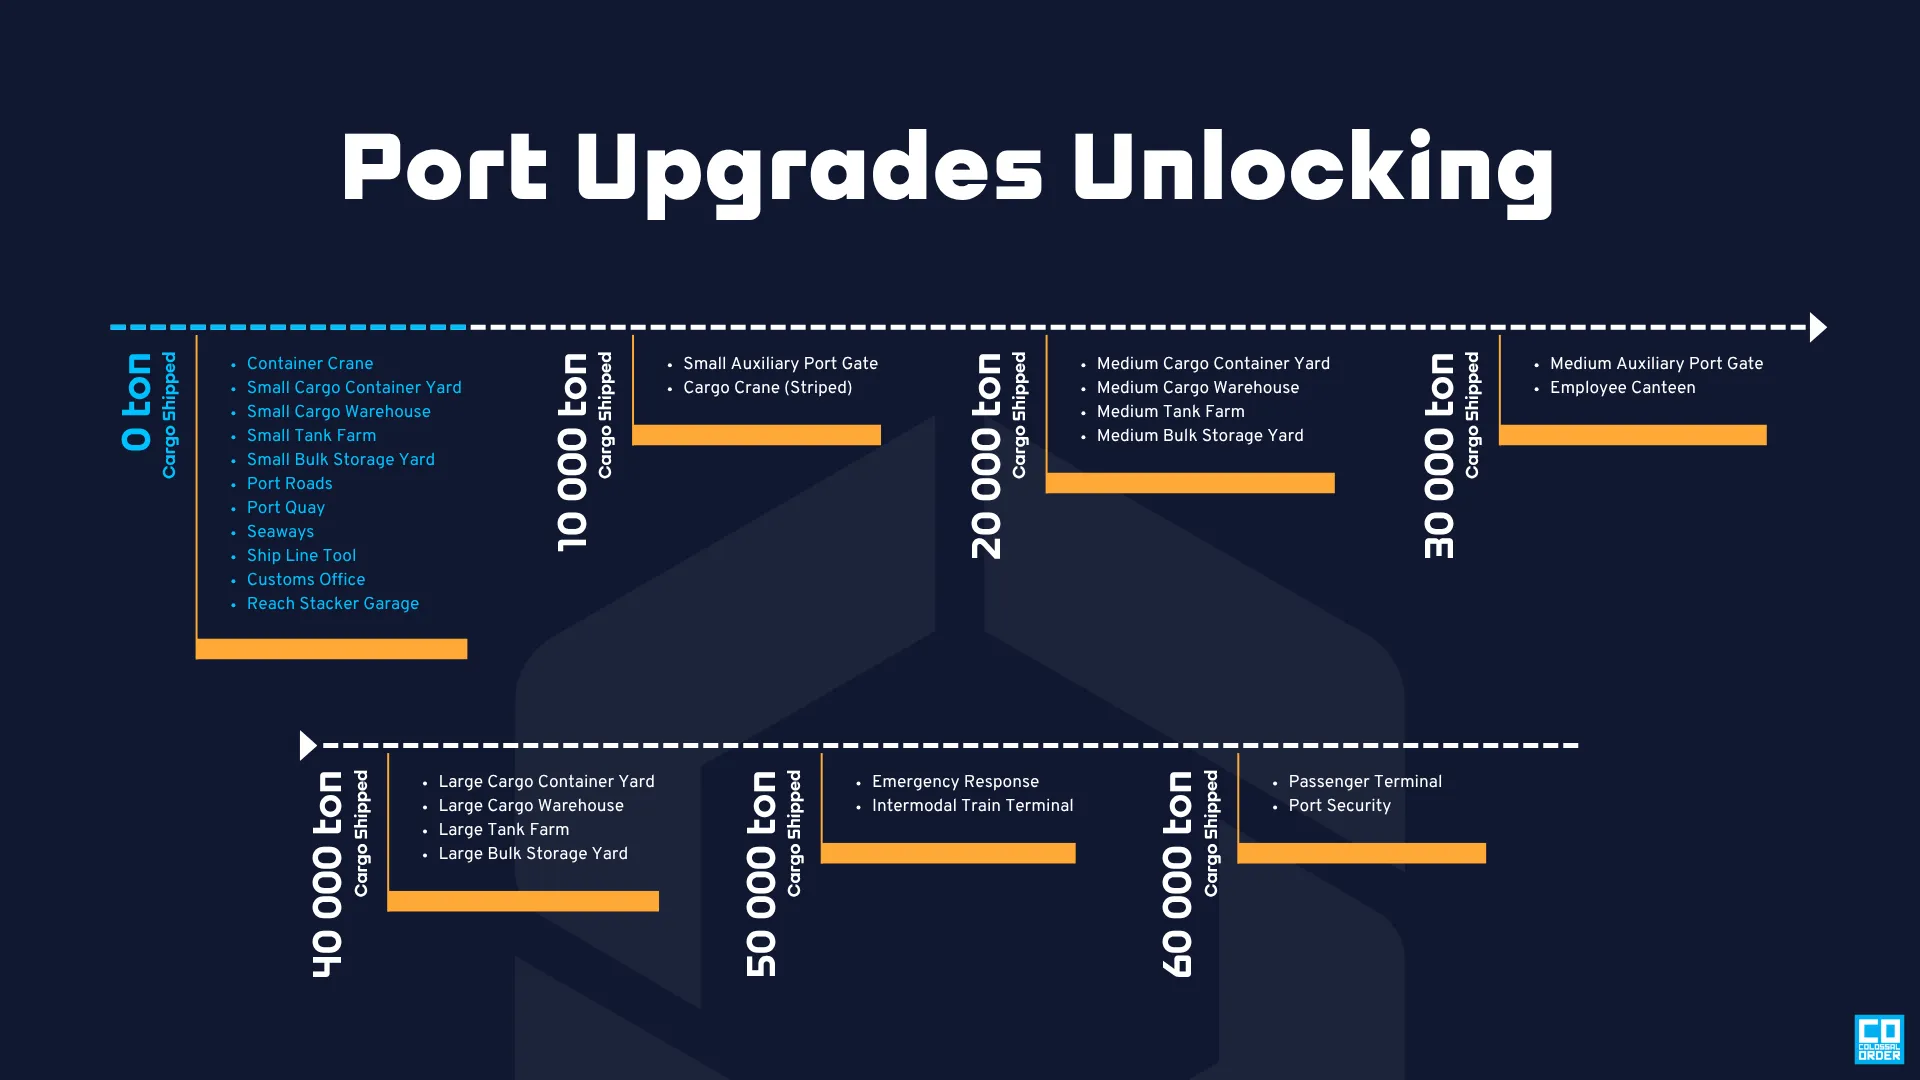 As you ship more cargo through the port, new upgrades become available.
The Employee Canteen provides a place for port workers to take a break and get a bite to eat, which makes for happier employees. Happy employees work more efficiently, and increased Efficiency means more available vehicles to distribute cargo around the city. But the upgrades aren’t just about efficiency. They’re also about keeping your Port safe, and that’s where the Port Security and Emergency Response upgrades come into play. The Port Security reduces the Crime Accumulation in buildings nearby, which is the risk that a building is chosen as the scene of a crime. Similarly, the Emergency Response building decreases the Fire Hazard nearby, so all your cargo doesn’t go up in flames. All three of these sub-buildings are Unique, meaning they can only be placed once per Port.
 The Employee Canteen, Port Security, and Emergency Response sub-buildings help keep your port running smoothly.
PICK YOUR PORT
Next, let’s talk about the Intermodal Train Station and Passenger Terminal sub-buildings. The Intermodal Train Station adds two train tracks to the Port, so you can connect Cargo Train Routes either to other parts of the city or to an Outside Connection. Meanwhile, the Passenger Terminal adds a place for passenger ships to dock, providing both citizens and tourists with a new way of entering or exiting the city. Once unlocked, both upgrades can be added to an existing Port or used in a separate one to create a custom dry port or passenger port, respectively.
Yes, that’s right. While cargo transport via ships is the main focus of the Port, its flexibility allows much more. To create a dry port, all you need is a Port main gate, an appropriate storage facility, and the Intermodal Train Station connecting it to your harbor, city, or Outside Connection. It can serve as a more flexible option to the Cargo Train Terminal, storing as much or as little cargo as you need.
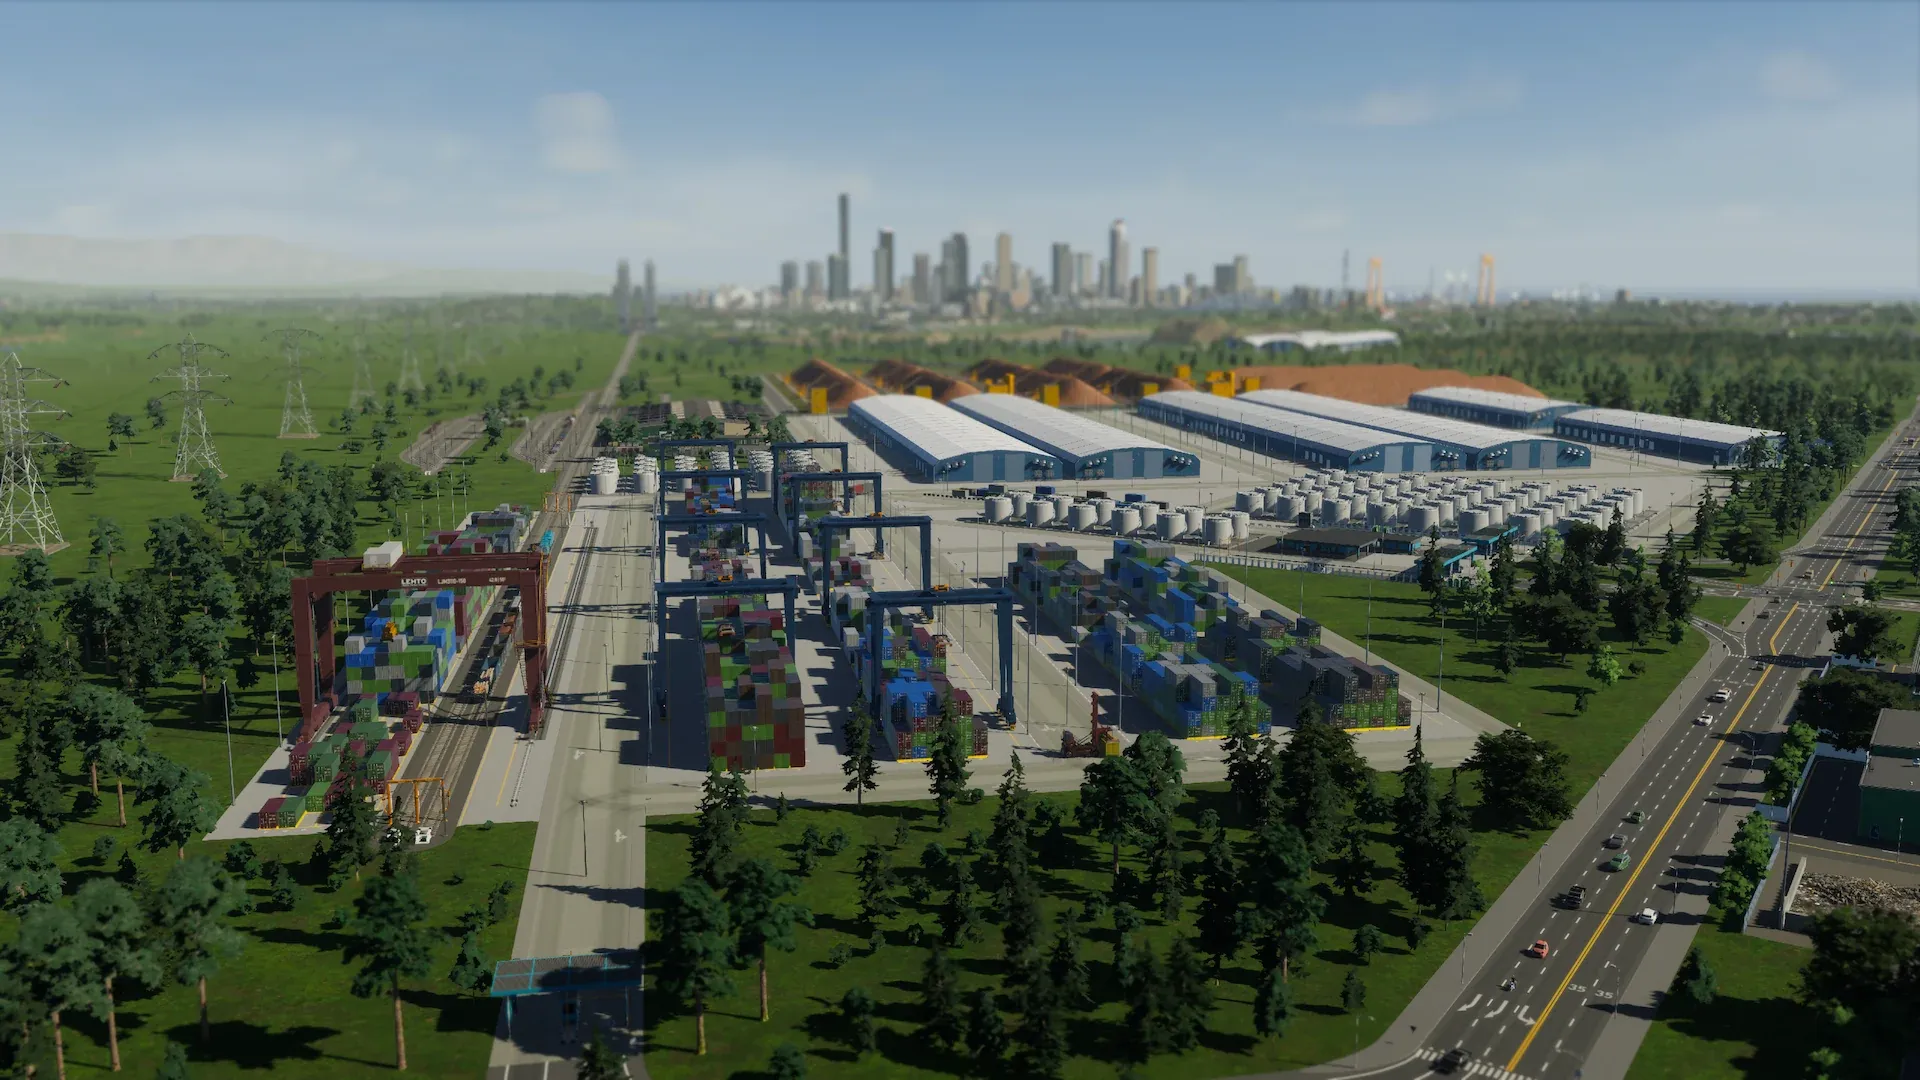 Build a dry port with just the amount and type of storage your industrial area needs.
Or take your port in a different direction with the new Fishing Industry and Offshore Oil Industry coming in Bridges & Ports. While we’ll let you explore the details yourself, both of these can be found in the Specialized Industry Menu and have a main building, just like the Port. You build out their piers, storage facilities, and extraction areas to best utilize the resources on your map, and set up Pipelines, Boatways, and Routes to connect the main buildings and extraction areas – all through the Upgrade Menu. Then you can sit back and watch the waters of your city come to life with fishing boats and oil tankers.
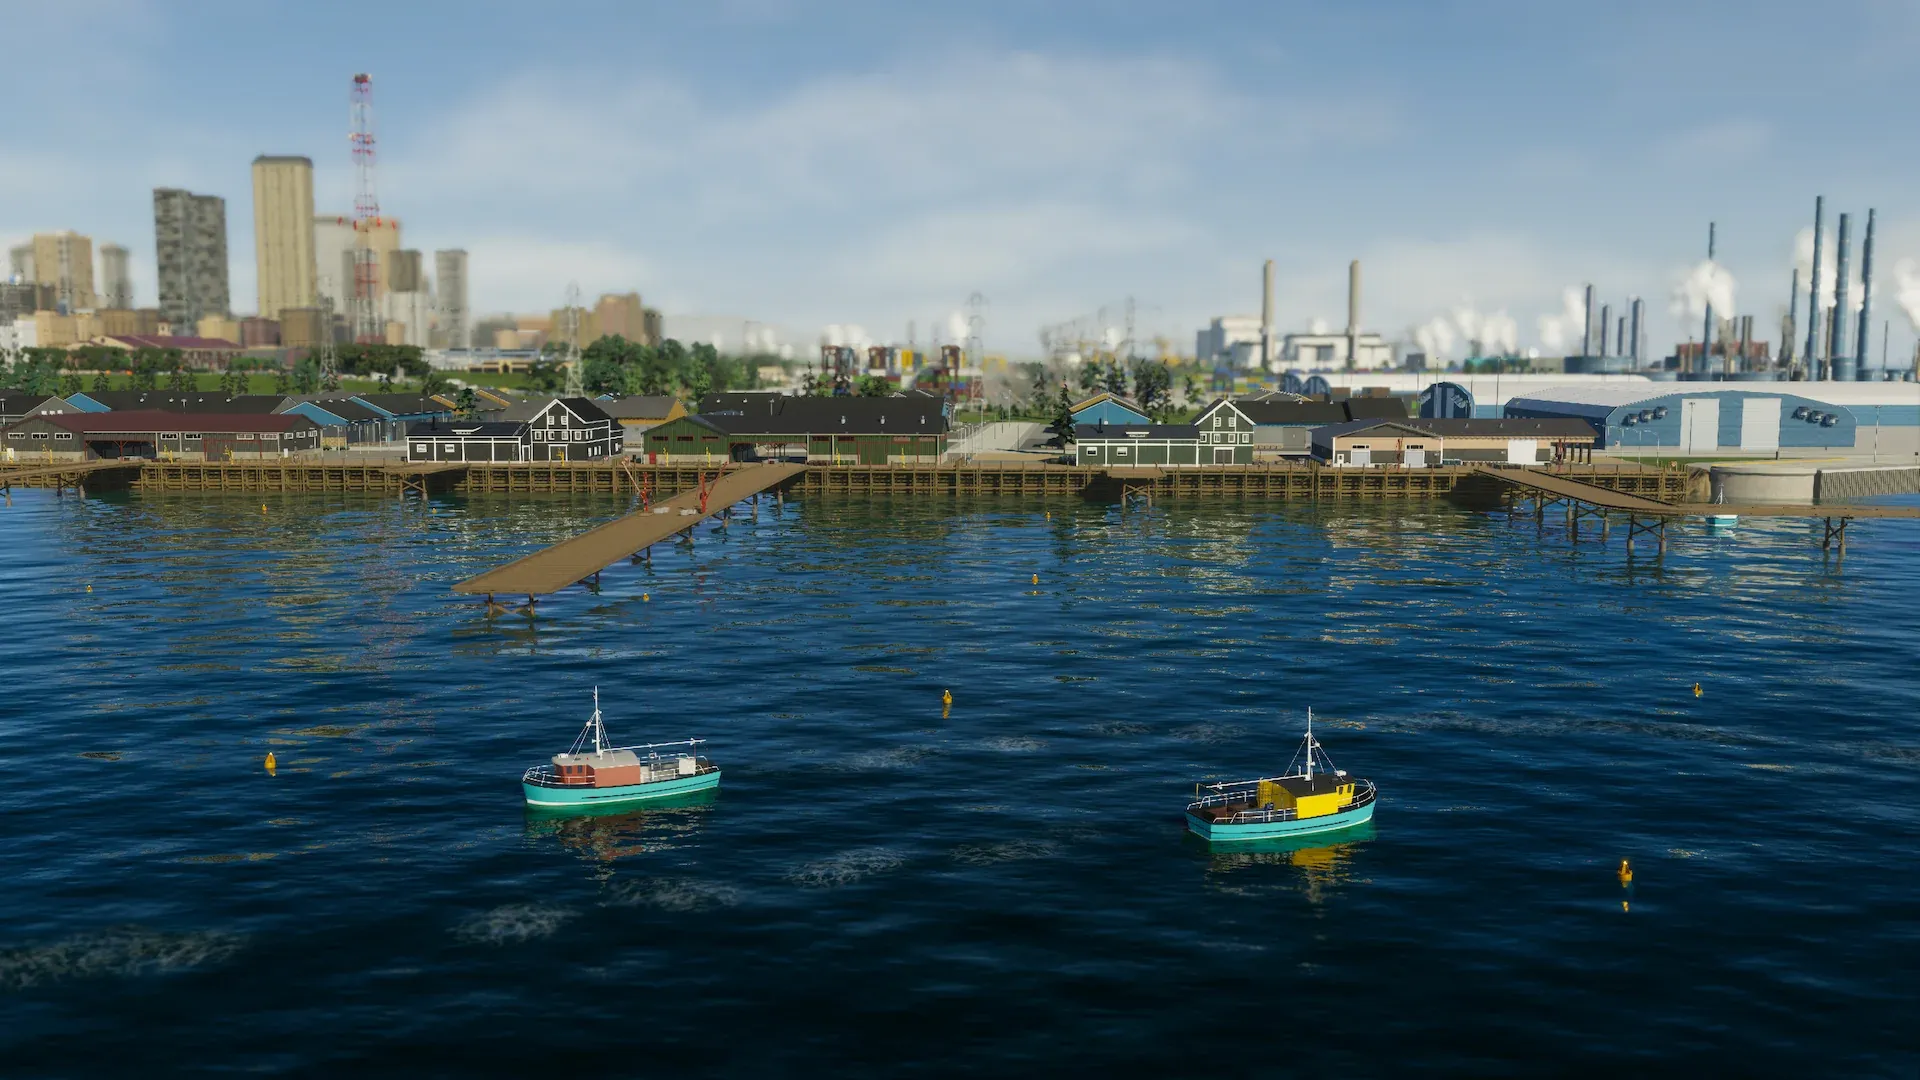 Fishing offers a new way to provide your city with locally-sourced food.
ALL ABOARD
Before we end this dev diary, let’s take a step back from the industrial side of ports and talk about how the Passenger Terminal can be used to build a tourist-focused harbor using just a Port main gate and any number of Passenger Terminals that make sense for your city. You can even start small and expand it with multiple terminals if the area gets busy over time. Add any of the existing tourist attractions or leisure piers to the area, or dive into the new parks, lighthouses, or waterfront businesses included in Bridges & Ports to make the area the highlight of your city.
In cities with a lot of waterways, you can also add ferries to connect your passenger port area and the rest of the city, letting citizens and tourists hop on a “water bus” cruising the waterfronts and beating traffic to their destination. While passenger ships bring people to and from your city, ferries are all about moving them around inside your city. Bridges & Ports features both a small Ferry Stop that can be placed on quays and a larger building that can be placed on shorelines, but for a busy harbor, you might want the Ferry Terminal, which can be extended with additional stops along the piers or upgraded to house a bus terminal.
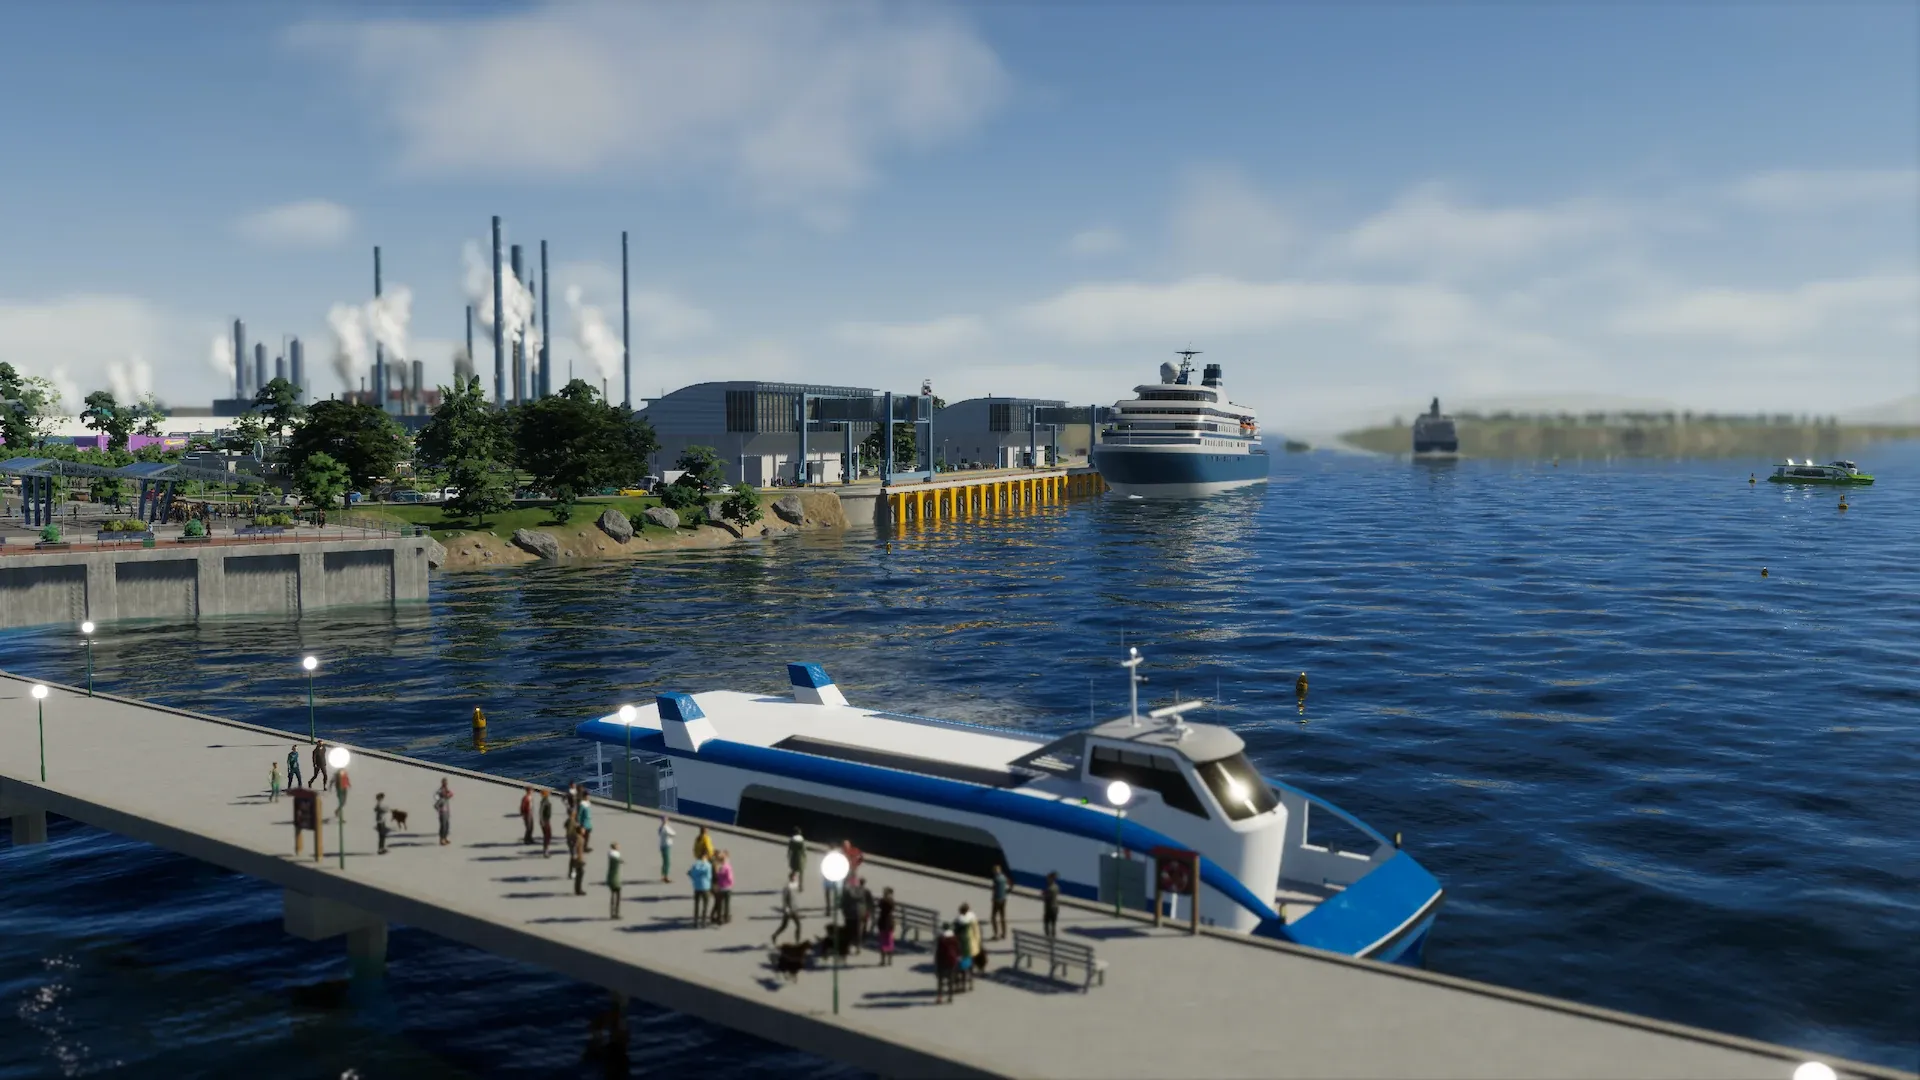 Ferries go well with a passenger port, taking people further into the city through its waterways.
With that, we have reached the end of this development diary. Thank you for reading along. Did it spark any new ideas for your cities? Do you already have a plan for how to use the new content? Tell us all about it in the comments below. We look forward to seeing your ports and waterways buzzing with new life, and hope you will enjoy everything Bridges & Ports has to offer once the expansion is available on the 29th of October.