Development Diary #13: Cinematic Camera & Photo Mode
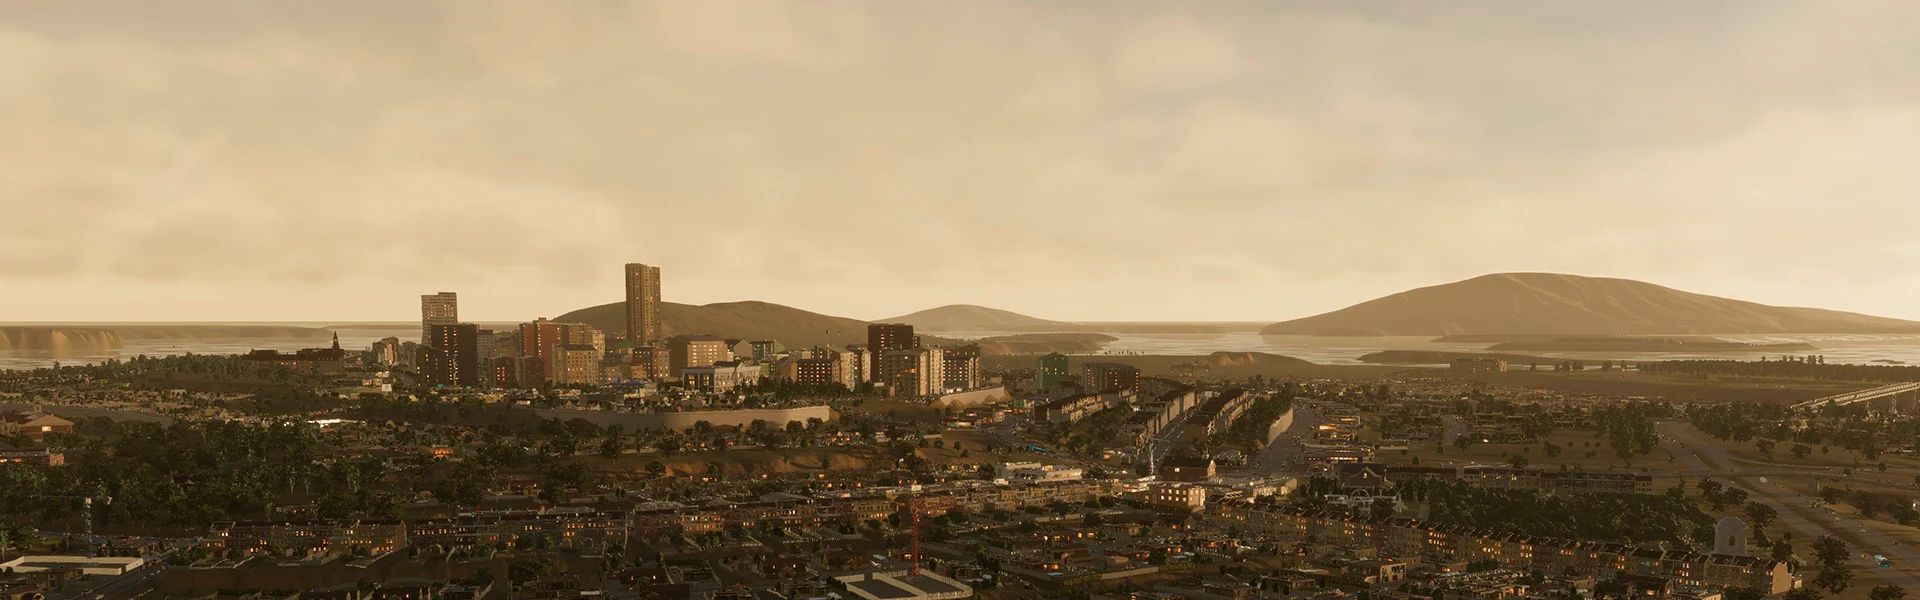
Hey everyone! We’re back with another installment of our development diary series. In this one, we will go over a feature that will help you capture the most memorable moments from your city! The Cinematic and Free Camera modes are completely different from what you are familiar with in Cities: Skylines. The difference between them is truly day and night. In Cities: Skylines II, both modes can be accessed by clicking the Photo Mode button located in the bottom-right corner of the main UI. From here, you can dive into the world of photo- and cinematography and capture your city in all of its glory, chaos, or spaghetti road madness with your friends or other players alike!
The power of these tools is really conveyed by the fact the in-game trailer was filmed using the built-in Cinematic Camera feature, and today’s diary is here to help you navigate the options so you too can capture amazing footage of your city!
SAY CHEESE!
It all starts with a vision, an idea. What kind of moment do you want to capture in your city? With that idea in mind, we wanted to really up the game on the Photo Mode feature and provide the necessary tools for you to take the picture of your dreams. Only your creativity is the limit as can be seen from all the options we have available in the below. We will not go through each individually because of the sheer amount of them, but we have provided in-game tooltips to guide you on how to use them as you explore Photo Mode.
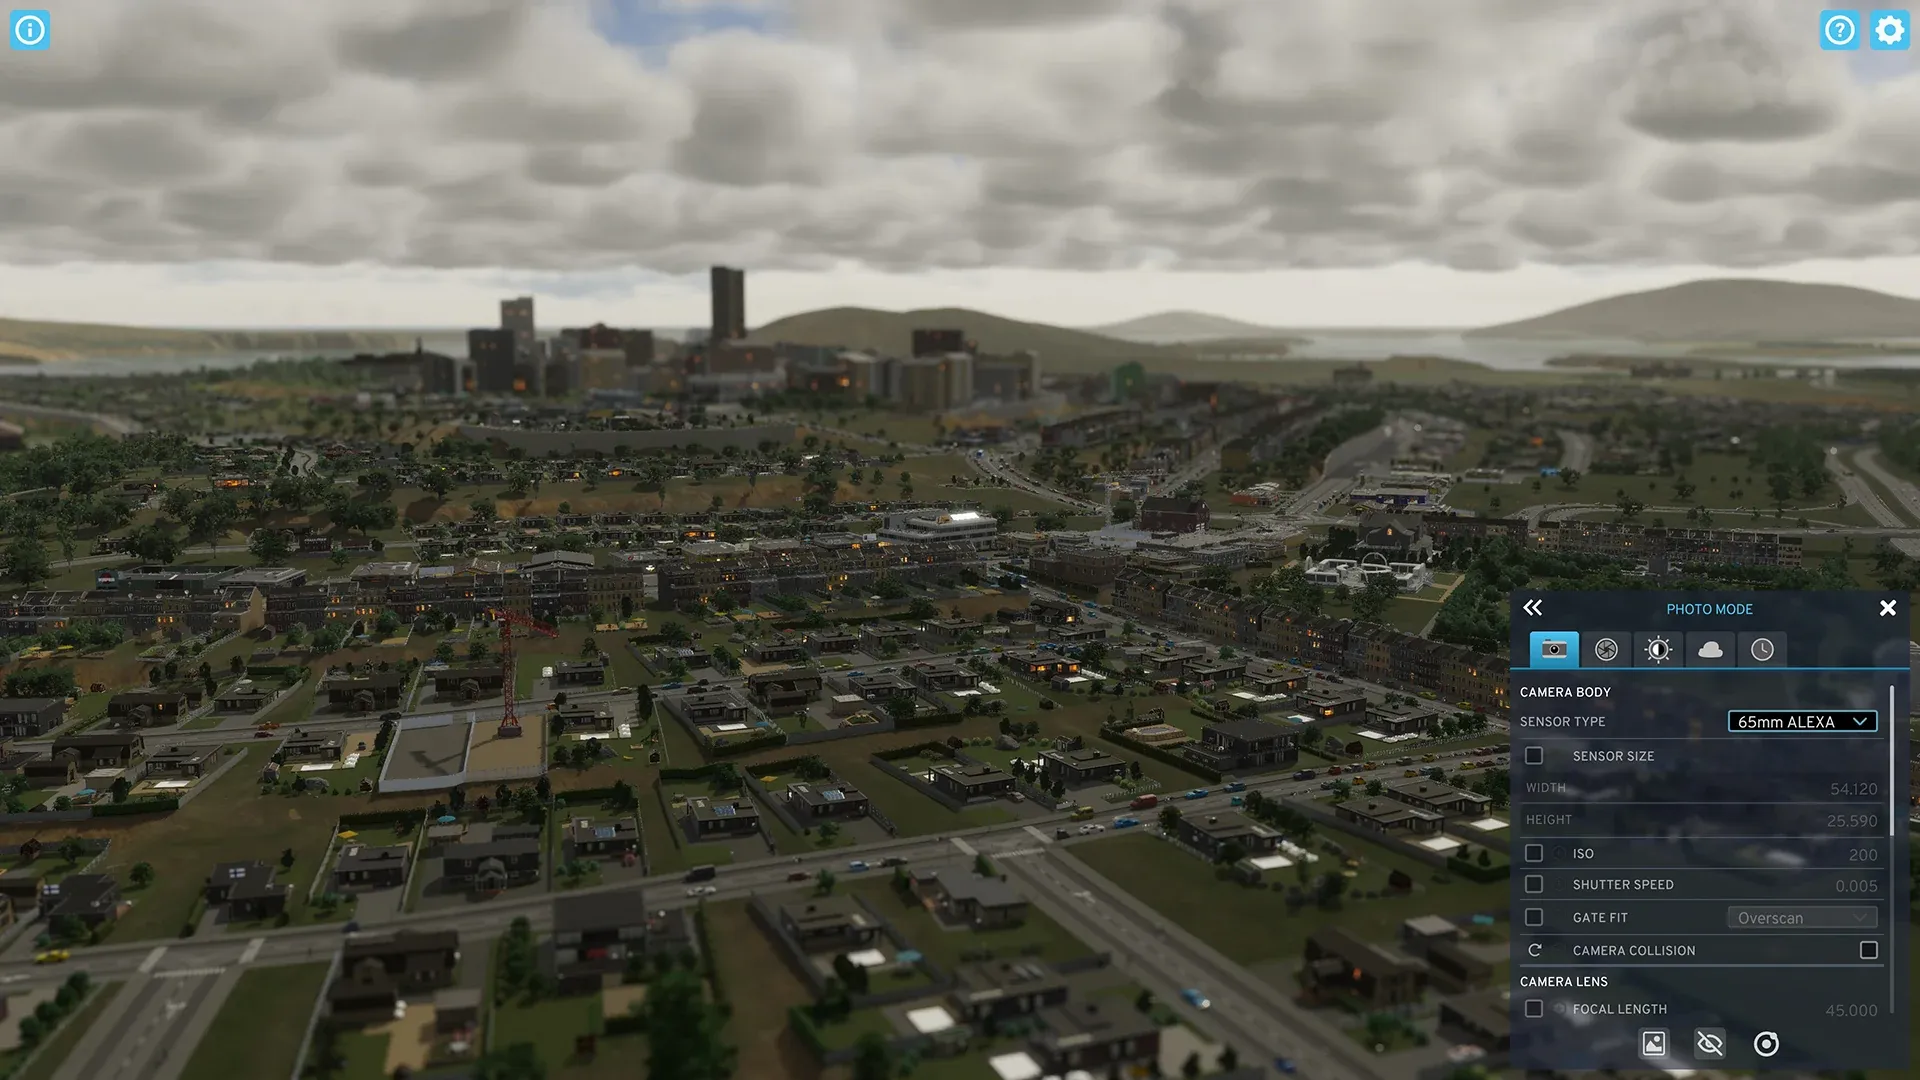 Photo Mode lets you tweak just about anything via the five tabs and many settings
The very first options tab you will discover is the Camera, from which you can change all kinds of settings related to the Camera itself. Examples of these include the Camera Body, Camera Lens, and Aperture Shape, all of which have sub-settings allowing you to tweak things like Camera Collision or Focal Length to get the exact shot you want.
From the Lens tab you can adjust the Depth of Field, Motion Blur, Bloom, Vignette, Film Grain, and Panini Projection settings, all of which can be fine-tuned for your needs. Next, we have Color and as the tab name suggests, you can make all kinds of changes to the color of the screenshot bringing different vibes to it. The options in the color tab include Color Adjustments, White Balance, and Brightness – and you can of course balance their individual settings.
To brew the perfect storm, we have the ability to adjust the Weather. From this tab, you can change the Distance Clouds, Volumetric Clouds, Fog, and Atmosphere. No need to wait for the weather to be perfect with all these controls at your disposal. Similarly, the Environment tab allows you to change the Time of Day and set the simulation speed, which is used with the Cinematic Camera, a feature that we will go over next.
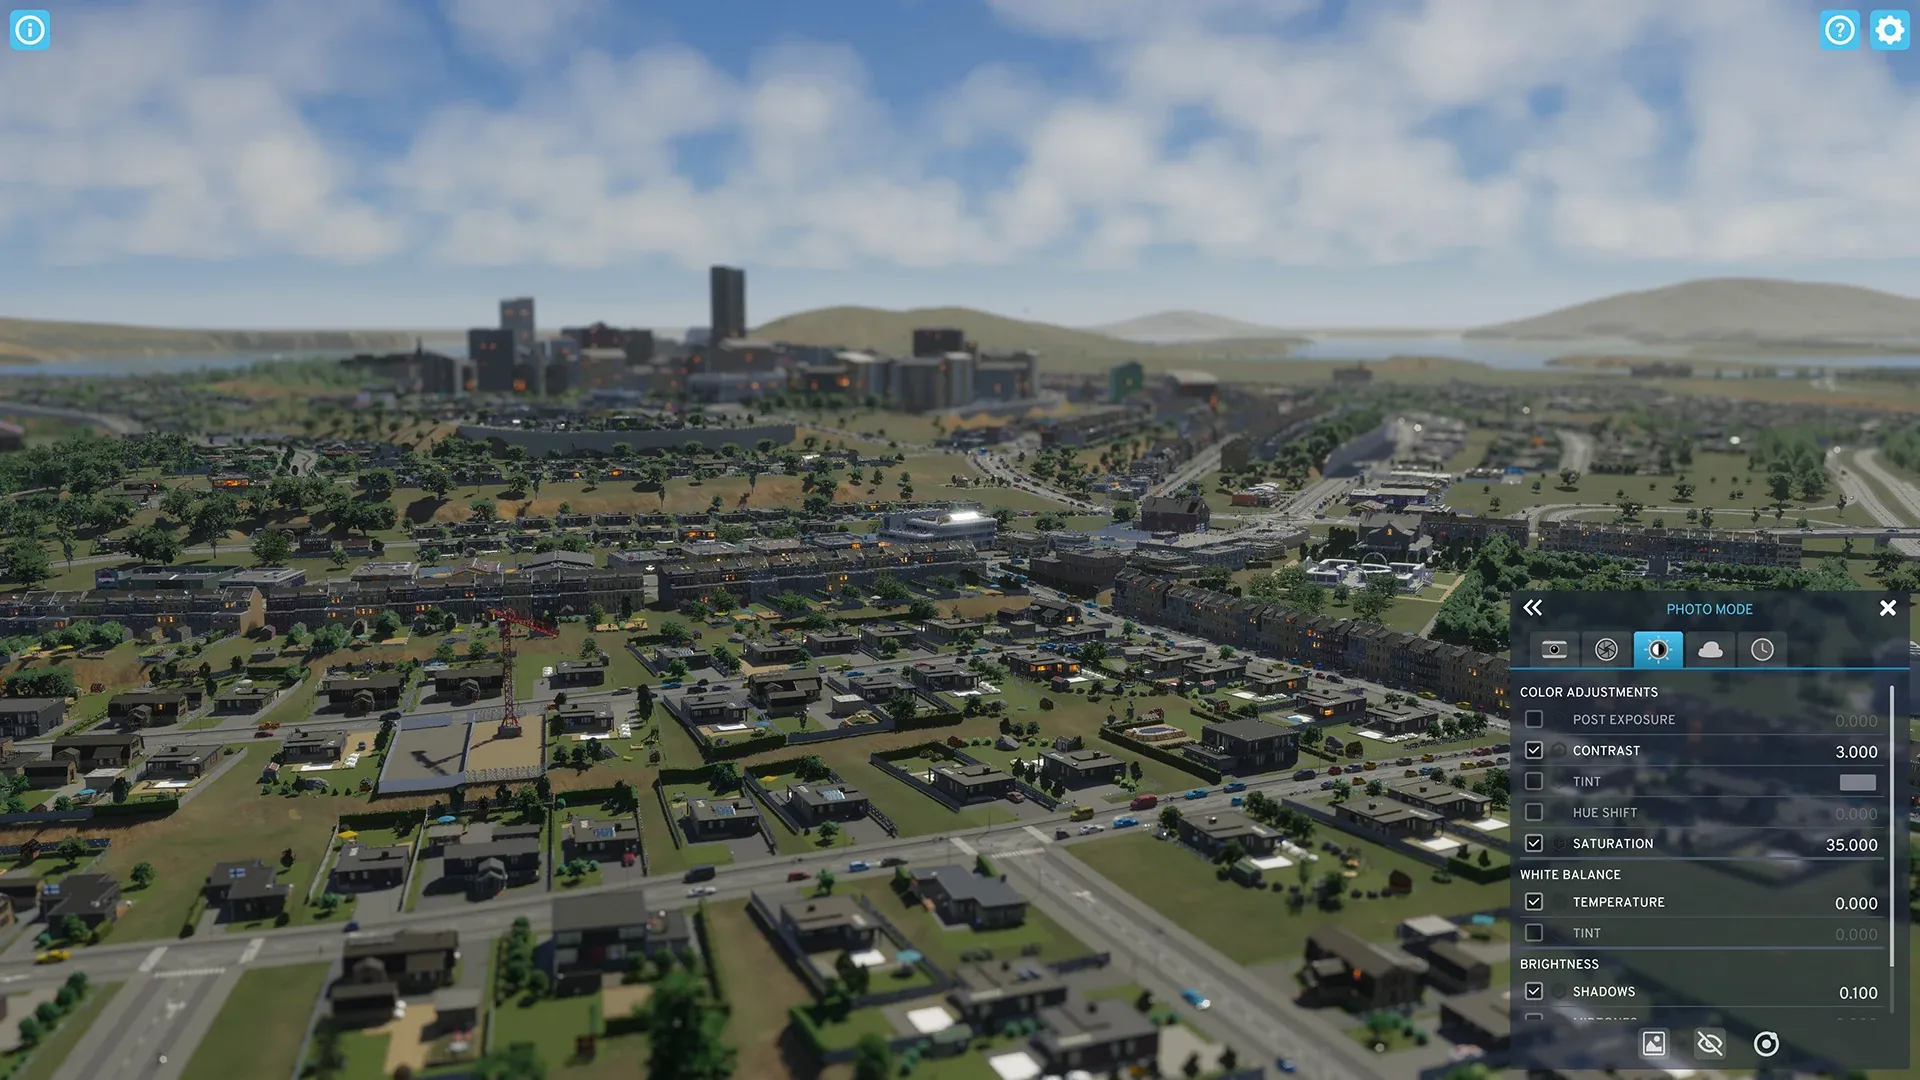 Get the look and feel that’s just right for your city and the pictures you’re taking
LIGHTS, CAMERA, ACTION!
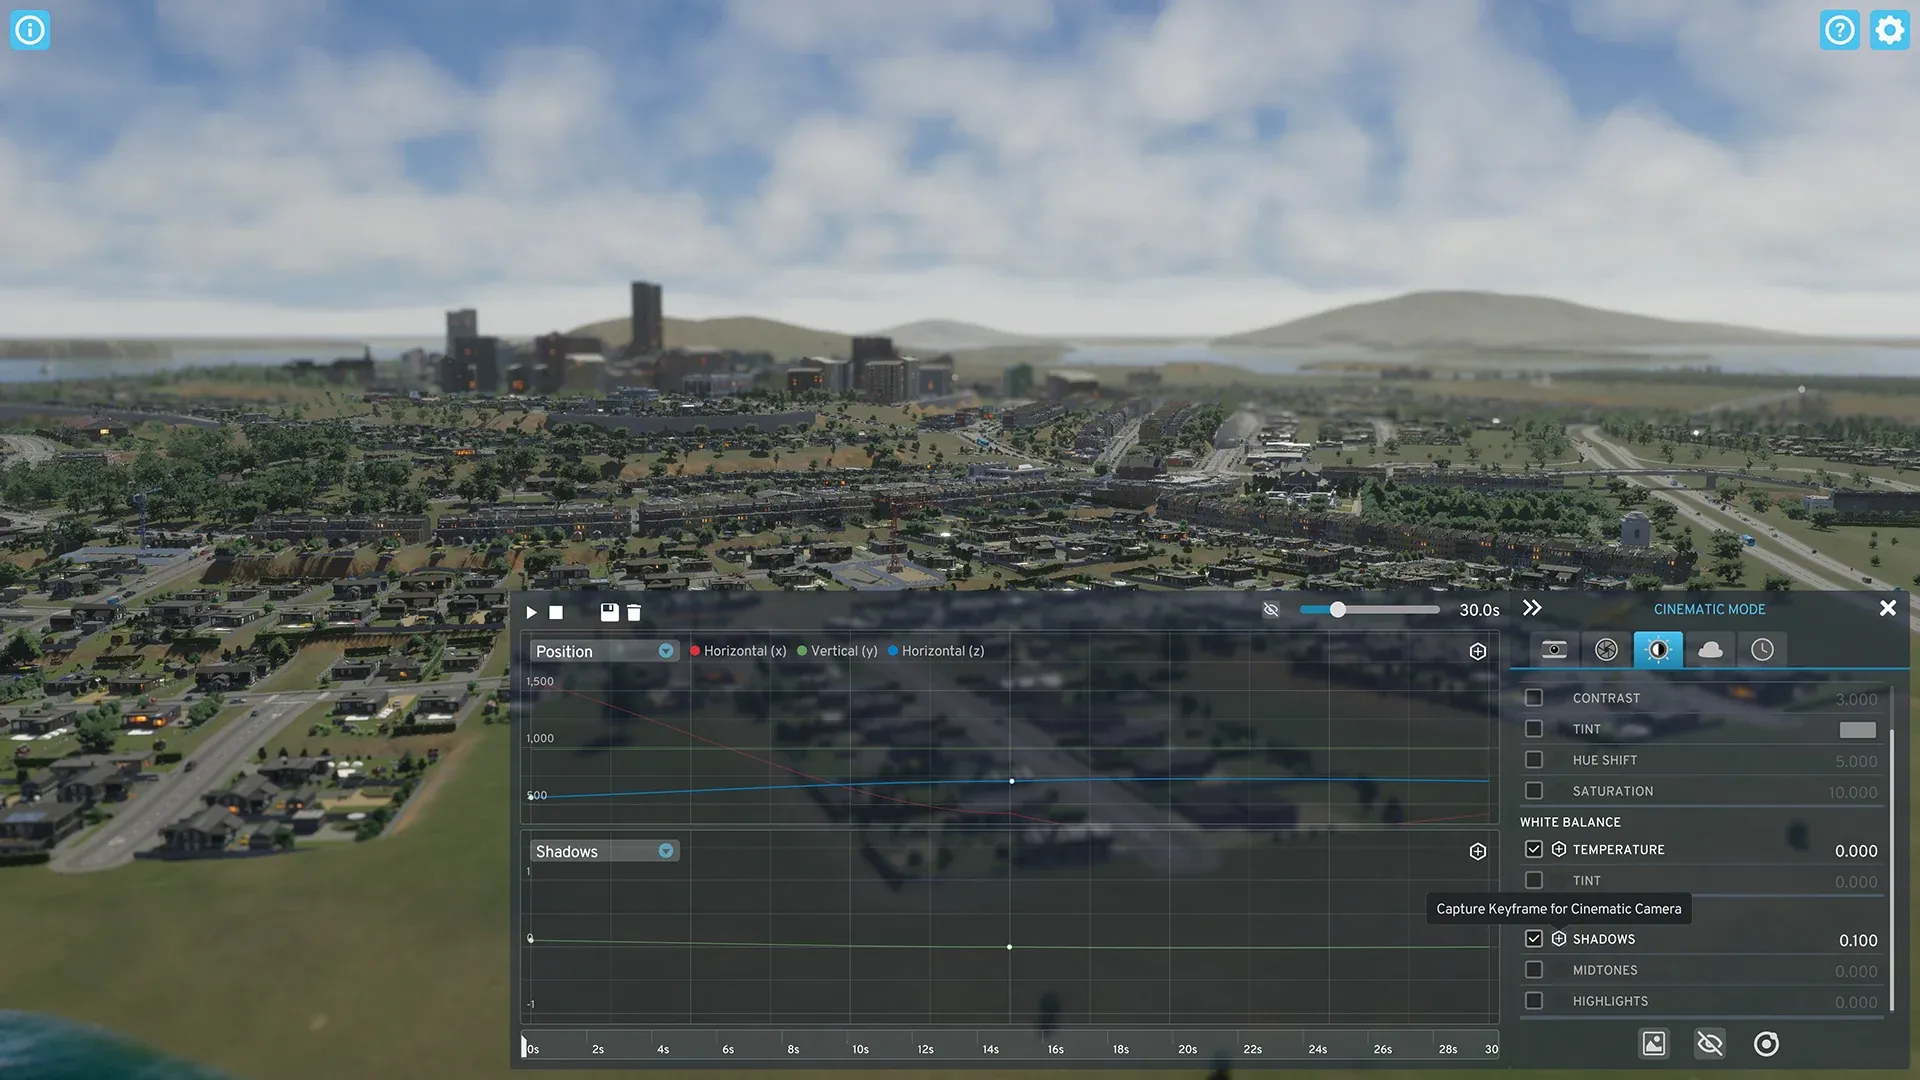
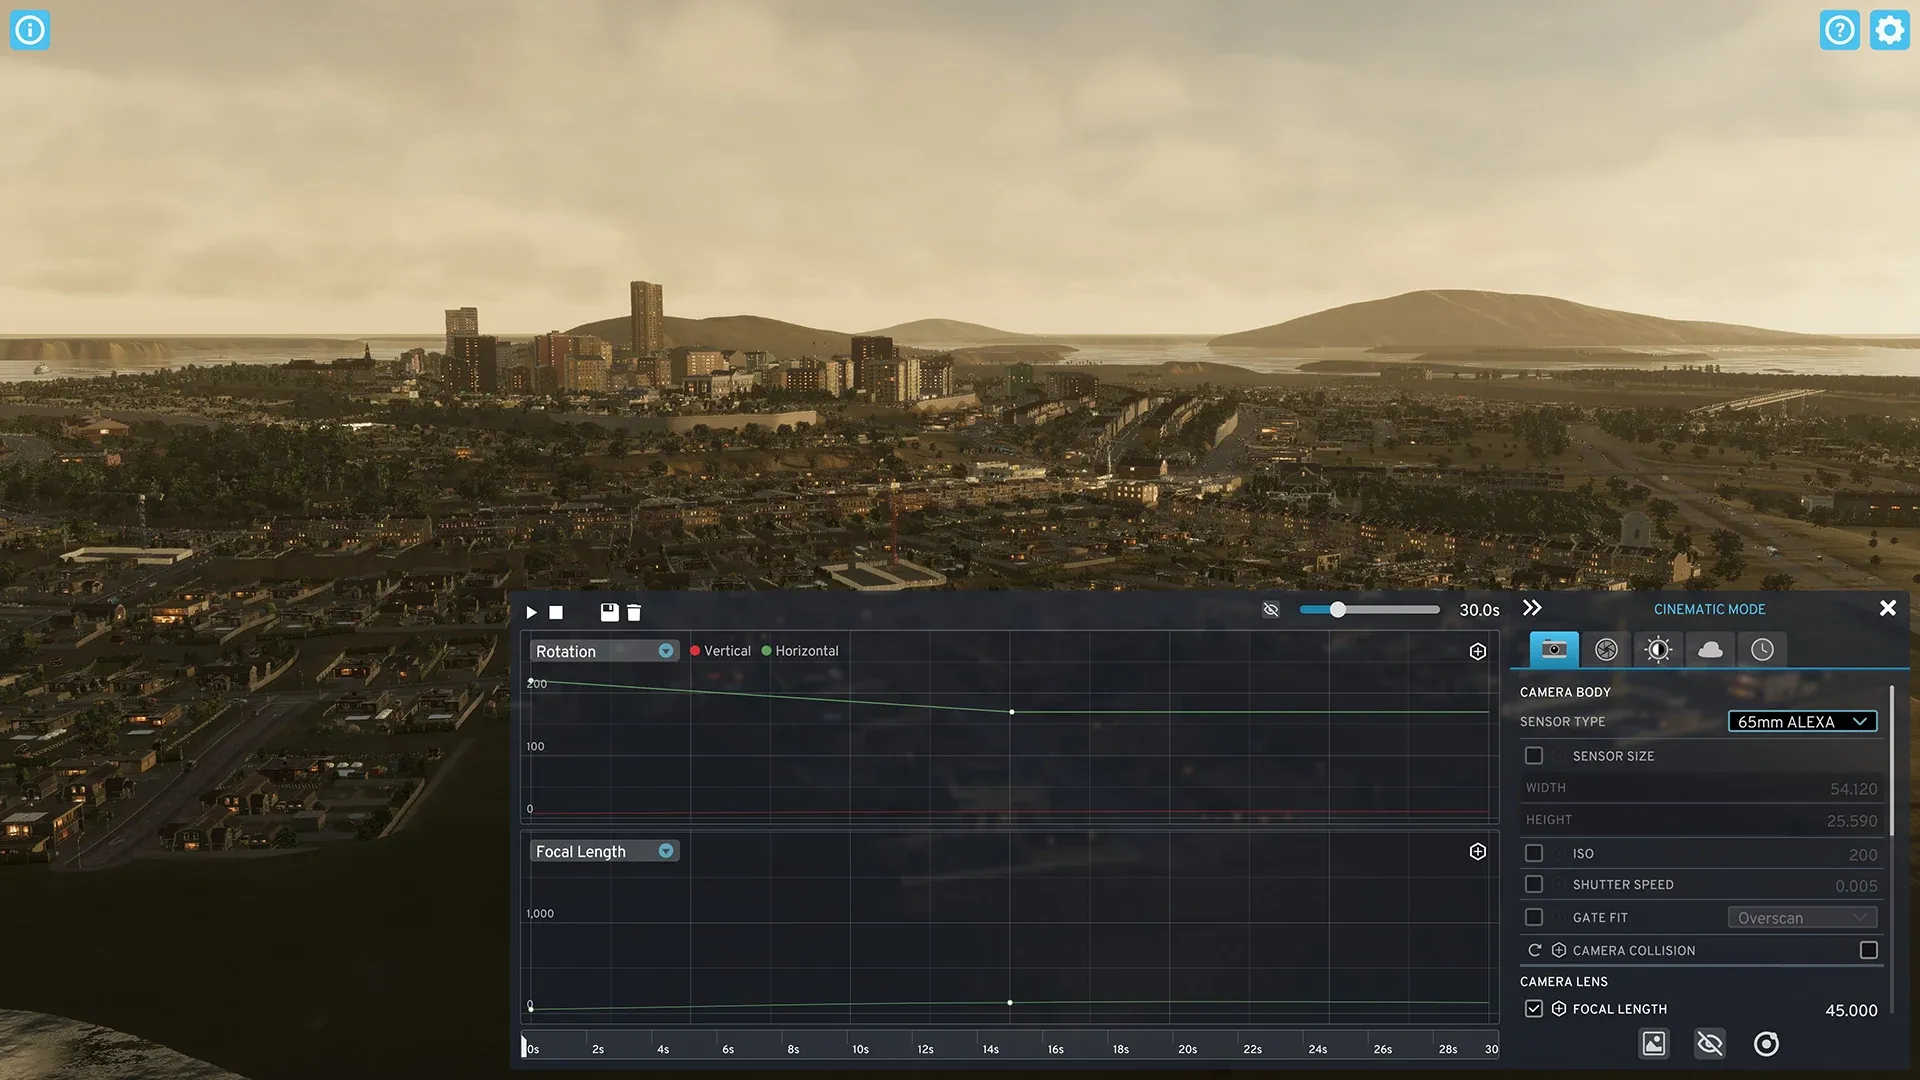
To move from photography and into cinematography all you have to do is click on the arrows in the Photo Mode panel. This opens the essential tools for the Cinematic Mode which consists of general tools at the top, two graphs allowing you to tweak Camera Position Controls and Camera Properties with a timeline at the bottom. Using these tools you can set up a playback, which can be recorded using any game capture software. Now, let’s briefly go over the different camera options.
 Get things moving with the Cinematic Camera tool
At the top of the UI, you find the general tools giving you basic controls of the cinematic camera. “Play” and “Pause” take you through the cinematic you have created, while “Save” lets you keep the setup for another time, and “Reset” gives you a fresh start when needed. By default, the UI is hidden as you play through the setup, but you can also enable it to see where you need to make adjustments. Lastly, the “Segment Duration” -slider enables you to specify the duration of the playback from 1 to 120 seconds.
A playback consists of a set of points, called keys, spaced out through your timeline. Typically, each point has a different camera position and the cinematic comes together as the camera transitions between these points. Each point can also have different Photo Mode properties connected to it, allowing you to, for example, change the time of day or weather during your cinematic.
The first graph is the Camera Transform Controls which control the position and rotation of the camera. The “Capture Key” button on the right will add the camera’s current position and rotation to the controls, which can always be adjusted. The dropdown lets you switch between the two, and properties listed next to the dropdown menu can be selected allowing you to change each of them. As you add additional keys to the timeline with different positions and rotations, you can also adjust the transition between these by selecting a key and adjusting the graph. Lastly, keys can be deleted by selecting them and using the “Delete Key” on the right.
A little further down you find the Photo Mode Panel. Here you can add keys for all the properties we discussed earlier in Photo Mode and create transitions between them. To get started, find the setting you want to add in the panel on the right, and click the “Capture Frame for Cinematic Camera.” This allows you to add new keys in a similar way to the Camera Transform Controls, and the dropdown lets you switch between the settings you have added. You only need to add options you want to transition between, such as the Time of Day or Focal Length. Any Photo Mode settings you have adjusted but not added to the Cinematic Camera are applied to the entire playback.
 All Photo Mode settings can be used with the Cinematic Camera
We’re very excited to see how you put both the Photo Mode and Cinematic Camera to use when showing off your new cities! We’ve given you a lot of control over the look and feel after seeing the many styles of screenshots and videos you shared of Cities: Skylines. This development diary concludes our look at the new game features and we’d love to hear which ones you are most looking forward to.